Tag Archive | hair care

Some Ayurvedic Plants that I Use for Hair

So, if you’ve been reading the past few entries, I guess you’ve probably picked up on that I’m crazy about using Ayurvedic and plant-based stuff for my natural hair care routine.

Henna 4ever T-shirt

Here are some of the plants that I use and their main properties:

Amla: Emblica officinalis or Indian gooseberry, is a round green fruit with antioxidant properties. Ayurvedic practitioners swear by this plant and not only use it on the hair and skin but also eat it. I don’t eat it because it isn’t sold here as a fruit where I live. It softens hair and helps to fix the dyes of henna and manjistha to the hair. I personally don’t like to use this plant too much because it darkens my already almost jet black hair, and I don’t want that!

Brahmi: or Bacopa monnieri, is considered THE herb par excellence for hair care. Like amla, brahmi is also antioxidant. It thickens the hair thus making it stronger and less prone to breakage. It also strengthens the follicles, which prevents hair fall. I use this quite a bit and always put some in my henna mixes.

Bhringraj: Eclipta alba is supposed to be a real tonic to help your hair grow and you are supposed to be able to use it if you are having hair fall or getting bald spots. I also add this to henna. And I also make a hair oil using this. I simply put one spoonful of Bhringraj into a large glass jar, along with a spoonful of Brahmi, a pinch of dried rosemary and another spoonful of Alkanet Root, then top the jar up with olive oil. I take a little bit of this oil to use every time I oil my hair.

I like to nickname Bhringraj, Brahmi and Amla as the sacred Ayurvedic triumvirate haha. Just the 3 of them alone are so potent, you can do almost anything even if these are all you have. So Popeye’s spinach, move aside!

Shikakai: Acacia concinna contains saponins, which are like a natural soap and actually do foam up. I originally wasn’t too sure about using this in a hair mask and I also didn’t really believe it could really wash well. But after adding Shikakai to the hair mask, when I was rinsing it out without using any other products like shampoo, I noticed that the water was coming out foamy and sudsy. So it apparently helps to clean and purify the hair and scalp and lathers up really well too.

Hibiscus: I add powdered hibiscus to my henna, but I make the hot infusion that I mix henna with using dried hibiscus flowers. Hibiscus grows in wonderful tropical places like southern Spain, where I live. It also grows in Hawaii and people there use it to make garlands. Hibiscus imparts red hues to hair and also softens it.

Reetha or Aritha: also called soap nuts. You can buy them whole, as soap nuts. Or you can buy them powdered. If they are powdered you can add them to your hair masks. But they wash things really really well. I do my laundry with them — with the whole soap nuts, I mean, not with the powdered ones. You can use Aritha alone or combined with other plants to wash your hair.

Manjistha: Rubia cordifolia is one of my favourite plants because it imparts my all-time favourite ruby red shade to my henna mixes. It really does turn my hair ruby red.

Red hennaed hair

You have to dye release it separate from henna because it doesn’t work with acids the way henna does. I was releasing the dye using baking soda, which is alkaline, but I might stop doing that because they say alkaline substances dry hair out. But it’s been working fine for me.

Alkanet Root: Alkanna tinctoria is a little-known secret plant that is supposed to turn your grey hairs back into coloured hairs. I’ve been using it for a while, now I can hardly ever find any grey hairs on my head anymore. But since I also henna frequently, I don’t know whether this is because I don’t have any grey hairs anymore, or because I henna so often there isn’t time for the grey hairs to grow long before I cover them with henna again, so you just never see them hehe. It also grows in the Mediterranean, so you’re not shipping it over from the other side of the world. I put a spoonful of Alkanet Root in a large glass jar along with a spoonful of Bhringraj, a spoonful of Brahmi and a pinch of dried rosemary, then top the jar up with olive oil. The Alkanet Root turns the oil a gorgeous shade of deep red. But if you try to dye your hair red with it, it won’t work unfortunately. I take a little bit of this oil to use every time I oil my hair.

Sidr: I tried washing my hair with Sidr or Ziziphus Jujuba once, you can read about it here. Like Aritha and Shikakai, you can use Sidr to wash your hair. I found out you can also use it like Cassia, to combine with henna to make it a bit lighter. But for that purpose I personally prefer Cassia, because it’s easier to get a hold of, it’s a lot cheaper and it doesn’t suds up. After all I don’t really fancy sudsy henna.

Cassia: I like Cassia obovata, which scientists now prefer to call Senna italica just so that they can get us all mixed up and boast about how they know Latin and we don’t harhar. (Believe me they do like to boast about it, my parents were scientists and in their day science students were forced to learn Latin at university. So after all that hard work trying to master a language that no one speaks today, how would you not boast about it?) Cassia is great to combine with henna to make the shade lighter, which I do all the time because when you have jet black hair you always want to pull towards lighter, and lighter, and lighter. But if you don’t want red hair and you want the conditioning properties of henna, you can use cassia instead. It will give your hair all the shine, strength and thickness that henna does but without the colour. If you dye release it, it might stain your hair a little bit yellow, if you want to go blonde. But I don’t mean like canary yellow hehe, more like a golden blonde shade.

Henna: Lawsonia inermis. If I had a personalized T-shirt it would boast a pic of a henna leaf and the logo “Henna till the end of my days” haha. Because that is how much I love my henna. My house is filled with boxes of henna. I thought I was a weirdo but then I saw a video of a woman who was about to henna her hair and her cupboards were filled with bags of henna too! When you get into the henna culture you just can’t get enough of it. I apply henna once a month and halfway through the month I apply a henna gloss too. So you can imagine I use up a lot of henna.

I thought I’d mention 2 more plants as well, rosemary and nettle. Because I wanted to know if there were any locally available plants that could help with hair growth, as it’s more sustainable to purchase local plants rather than get them shipped over from the other side of the world. Well I could never find any local alternative to henna, but rosemary and nettle are pretty mean locally-grown alternatives that could probably put up a good fight with Bhringraj to help get your hair to grow.

I bought dried nettle as well. Well you certainly don’t want it fresh, it stings! I haven’t tried it yet though. But you can use it the same way as rosemary, that is, infused in oil to use as a hair oil or in hot water to add to your hair masks.

So these are the plants that I use on my hair. I might add that I don’t spend the whole day every day brewing up plants for my hair care, even though from these posts it might seem that way. Most of the time I use store-bought hair products filled with artificial chemicals because I’m lazy and busy.

But I try to put plants on my hair once a week or if I’m busy, once every 2 weeks or at the very least, once a month.

Red hibiscus flowers

So how about you? Do you use plants on your hair or in your skin care? Don’t hesitate to leave me some comments below, I lurrrve (positive, non-spammy) comments.

And while you’re at it I’d also love it if you’d check out some of my thrillers. You can find out more about them here: Thrillers by Moi.

If you enjoyed this post (I really hope you do!), maybe you will also like:

Daily Supplements

DIY Catio for Cats

On Christmas Day in the Morning

Castile Soap and Coconut Milk for Hair

Advertisement

Life is Complicated When You Use Natural Products

I wish my life could be as simple as that of “normal” people, like my ex.

Natural Red Flowers and Natural Products

My ex doesn’t use anything natural or ecological. He just goes to the supermarket and buys what everyone else buys.

He washes his laundry with any generic brand (supermarket brand) of detergent, whichever brand is cheapest, and uses generic brand fabric softener which in addition smells good. He doesn’t complicate his life.

He showers with regular shower gel and washes his hair (what little he has left) with regular sulphate shampoos. He doesn’t use conditioner, but then again he doesn’t have much hair to condition. (Har har I’m so mean aren’t I hehe?) He doesn’t use henna or colour his hair and it’s peppery hair.

But then again as they say I guess once you wake up (become aware) you can never UN-awaken again or become unaware again.

Unaware of all the harmful synthetic chemicals that they put in all the products that we use like in laundry detergent, fabric softener or shampoos.

Unaware of how harmful these synthetic chemicals are both for your health as well as for the environment. Unaware that going as natural as possible is the best thing you can do both for your health as well as for the world.

And you can see the results in the health of both my ex as well as his father. Ex has hardly any hair left. Of course I realize that is hereditary.

But maybe a healthier diet, lifestyle and healthier hair care might have made him go bald more slowly or even stopped him from going bald. I certainly know I DEFO have more hair and thicker hair since I started doing things to take care of it.

My hair has certainly come a long way since it was strawlike and fried years ago from monthly hair dyes dyeing it red. Before I discovered henna, I used to use a home hair dyeing kit in a box that was supposed to be more “natural” since it was supposed to be herbal. Well there was nothing herbal about it it was full of harmful chemicals. Maybe it had like a drop of herbs in it haha.

It just seems to me that my life is so much more complicated than my ex’s. He doesn’t wash his clothes with soap nuts, nor put baking soda, washing soda, ammonia and soap flakes into his laundry. He doesn’t wash his hair with solid shampoo, spend hours oiling it and whole days hennaing it.

I’d like to be able to live like him. I’d like to just throw the clothes into the washing machine, dump in some detergent pods and pour a bit of fabric softener into the fabric softener compartment and then just forget about it.

But I can’t do that anymore. Now I know all the junk that’s in laundry detergent, and that’s getting on your skin every time you put on your clothes washed in laundry detergent, and now that I know how bad laundry detergent is for the environment and how it’s killing fish and birds, I just can’t do that anymore.

I wish I could. It would make life so much easier, but I can’t. I wish I could continue to live in blissful ignorance.

But once you become aware you just can’t become UN-aware anymore.

Of course you could also not care. Ex probably sometimes hears about how laundry detergent is bad for lakes and fish and stuff, but he probably just doesn’t care.

I’ve been using soap nuts now I think for about 6 months. And it’s not as simple as using laundry detergent. I have to put the soap nuts in a jar of very hot water for about half an hour in order to activate them before doing the laundry. You can see already it’s more complicated using soap nuts than laundry detergent.

Then after half an hour, when the soap nuts have been activated and have started releasing soap, I throw the sack of soap nuts into the washing machine and also pour in the hot water that was in the jar with the soap nuts. Then I pour in a ton of water into the washing machine because I have a high efficiency front loader — the most popular type here in Europe I guess — and the reason it’s high efficiency is it hardly uses any water. But soap nuts need water to activate. So I have to manually pour in lots of water.

After that I just let wash as normal. But if the load is quite dirty and greasy then I do another cycle with ammonia before the soap nuts. Because soap nuts don’t work well with very greasy clothes. So you can see already that it’s more complicated than using laundry detergent.

But I think the results are worth it. Because then after that I know we are wearing clothes that have no harmful chemicals in them that can get into your skin. We didn’t throw anything down the drain that will later kill fish and birds. And it’s very cheap to boot.

And nothing feels like clothes that have been washed with only soap nuts. Clothes have a softness, mmmmmmmmmmmhhhhhhh, like you’ve never felt before not even with fabric softener. They feel like LIQUID CLOTHES that is how SOFT they feel.

But once again if you are a normal person you probably don’t care if your clothes are soft or not. And you’re probably not thinking too much about wildlife and all these strange and unknown plants and flowers out there. After all, animals and plants you never see have nothing to do with you anyway, right?

I read somewhere that if animals died, humans would die too. Because we depend on them in order to stay alive.

And I’m not just talking about how some people can’t live without steak or lamb chops either haha. But I’ll get off the soap box now. I’m sure everyone already knows all about this stuff.

Moving on to the category of hair care. My ex has hardly any hair left, but you really can’t tell how much of it is due to heredity and how much is (slack) hair care and lifestyle. I told him there are things you can do to not go as bald but he said he’s just given up.

I know there is some medicine you can take that prevents going bald even if you suffer from hereditary baldness. I used to work at a hair clinic and the doctor told me that. He said he himself takes that medicine and he has some of the thickest hair I’ve ever seen on a man his age.

And I told ex that. But he said he’s given up on his hair.

And then people say when women get old they lose their hair too and it gets weak and fragile and thin and breaks easily and falls off. And so I am fighting against that. Genetics helps, I’m blessed with very thick coarse hair so it doesn’t get as fragile and thin as easily.

But you still have to WORK to have great hair, especially after a certain age or certain life events (ie. pregnancy haha).

I still look at the hair I have today and the hair I had before my oldest son “Ermenegildo” was born and really, there’s no comparison. It doesn’t even look like the same hair.

I did have pretty thick hair before Ermenegildo was born too. But it was so strawlike and dry and damaged and fried from using hair dye every month. It had no shine at all and it looked stiff and hard. It did have a nice colour, it was redder than it is now because you can get a stronger colour on dark hair with artificial dyes than with henna.

But it was so stiff and dry. Today I have such soft hair and it’s shiny and has big bouncy curls.

Big Bouncy Red Curls

But I do have to work harder than my ex to have that kind of hair. I have to henna every month because I do have grey hairs now, and also it is what I have to do if I want red hair and I am not a natural redhead.

I do try sometimes to go back to a simpler routine of just throwing in some laundry detergent into the washing machine and some fabric conditioner.

But then I KNOW all the gunk that is in the clothes, even if they come out soft thanks to the fabric conditioner and they smell nice. But I still KNOW all the gunk that is in the clothes and that will then go into your skin and then into your blood.

Laundry detergent is full of chemicals that can cause cancer and even if they don’t give you cancer they can still contribute to all kinds of medical conditions like heart probs, diabetes, high blood pressure, arteriosclerosis and a long list of etc’s.

Now that I KNOW what laundry detergent does to you when you wear it, well I mean when you wear clothes that have been washed in it, you just can’t NOT know about it anymore. And I KNOW what is in clothes that have been washed with laundry detergent.

And so on with everything else in life.

Which makes life complicated when you use natural products.

And I’d always wanted a simple life. But I guess we do not live in a simple world.

If you’d like to read about more complicated things in life, such as complicated and twisty plotlines, I’d love it if you checked out some of my thrillers. You can read about them here: Thrillers by Moi.

So do you use natural products? Do you find it complicates your life? Do leave me some comments down below. I LURRRVE to receive (positive, non-spammy) comments.

If you enjoyed this post (I really hope you do!), maybe you will also like:

The New Mask-Filled World to Come

Soapmaking

Rain 

Harira Makin’

Daily Supplements

Everyone is always talking about the superfoods and daily supplements they take. I imagine the ones that work best for you would depend on what you are like, what health problems you suffer from, what health problems you’re more likely to develop and therefore would like to target the most, your age, etc.

I’m constantly changing around the daily supplements I take. But these are the ones I’m using as of this writing.

Daily Supplements and Vitamin Bottles

I discovered hydrolysed collagen from a video during lockdown so I started taking it. I also read some hysterical reports of people warding off COVID with massive amounts of vitamin C. So I started taking that too.

Eventually, when the panic died down, I realized I was taking just too much vitamin C! So I switched from the heavy duty brand I’d conjured up from Amazon to a more reasonable tube from the supermarket (Mercadona brand actually, if you’re here in Spain and you happen to be interested).

I’ve found it really helps me to take vitamin C. Since I started taking it I don’t get hungry as often and I have more energy. So I have no intention of giving this up!

I like to take the vitamin C with some fruit juice. I don’t really know if it makes any difference but I figure vitamin C is an acid so I s’pose it can’t hurt to take it with some acidic food like fruit juice.

I also take a multi-vitamin with the juice. Truth is I haven’t really noticed any effect from taking these multi-vitamins, but I figure it can’t hurt.

(I’ve since stopped taking these, because I didn’t feel any different from taking them. But I read a report on the news that multi-vitamins help to prevent Alzheimer’s. And my son still takes them.)

I like to put chia in my morning drink but I usually forget. So now you know, if you remember, throw a spoonful of chia seeds in your morning drink. And remember that chia seeds need to either be ground up or soaked in your drink for a few minutes for it to take effect.

After my second son, “Lucrecio”, was born all my hair fell out. Well, not all of it. But it seemed that way. But the worst thing was that it never grew back!

So I started a vigorous hair-growing campaign a few months ago and started bombarding my hair with every kind of daily supplement you can imagine. I upped my natural hair care routine and you can read all about it here.

But of course, I couldn’t improve my hair routine without taking hair vitamins. So I started doing that too.

I began by taking Phytophanère. You can get that at some pharmacies. They are little brown pills with a smooth coating and they taste just so delish, like chocolate candy. I think they’re mainly a vitamin B complex.

I didn’t notice a huge increase in the thickness of my hair but I did seem to get some moderately extra baby hairs. What did happen was that my nails started growing a lot stronger and faster.

I then switched to biotin, 5000 micrograms of biotin and 500 mg of niacin. That did make a difference!

My hair started falling out a lot less. I can’t really tell if a lot more has grown out because I only started taking these vitamins 8 months ago, so if more hair has grown out it’s not really long enough to notice yet. But I think it’s a tad bit thicker on top. Maybe?

And finally I also throw in some omega 3 capsules and a spoonful of brewer’s yeast in the morning drink. Don’t really know if it’s doing anything, but omega 3 is always good for ya, isn’t it?

Since writing this post a few months ago, I’ve since switched to a multiple-B complex. I got it on Amazon. It contains the complete range of all B vitamins, folic acid and a couple other stuff thrown in as well. This makes a huge difference in my life! I now have a lot more energy. Almost as much as a normal person hehe.

I’ve also started taking Lutein, after my ex sister-in-law praised the wonders of lutein to me. She’s selling herbal and vitamin supplements now since losing her job during Covid.

Incidentally, she started selling these vitamins when she found that she was suffering from “long covid”. That is, side effects that just wouldn’t go away.

A neighbour recommended vitamin supplements. She took them, and all her covid symptoms went away!

So now she sells these supplements herself.

So I looked lutein up on the internet. Turns out some sort of study somewhere — I didn’t take note so I can’t cite it — seems to show that people who took lutein after a certain amount of time were 100% free of degenerative eye diseases such as macular degeneration.

On the other hand, the control group, who didn’t take lutein, by the end of the study about 1% had developed some degenerative eye illness.

Degenerative eye diseases are fortunately not very common. Even if you do nothing at all, the chances are great that you will never develop such an illness anyway.

But it never hurts to give your probabilities a little push in the direction that you want, right, heehee?

So I started taking lutein as well, about 10 mg per day.

You can also get lutein from tomatoes. I don’t eat a lot of tomatoes, I’m not particularly fond of tomatoes (or anything acidic, I’ve always been known as the acid girl because I’m so acidic naturally I turn silver black within just a few minutes) and I don’t prepare pasta with tomato sauce nearly as often as I should. So I figure maybe I could be low on lutein.

And finally, because my cat is allergic to pollen, I started taking pollen too.

So, you say. If your cat is allergic to pollen, why do YOU take the pollen? Are you and your cat one and the same?

Well, since affirmations appear to be all the rage these days, we can all go around chanting — and I encourage you to do this every day:

“I and my cat (or dog, if you have a dog) are ONE! I and my cat (or dog) are ONE!”

If you do this every day you will probably start to find that slowly, day by day, you and your cat (or dog) will probably start to merge together into one single being.

Many people swear by this fix. Do try it out.

Cat Allergies

Well, as I was saying, since my cat is allergic to pollen, I started taking pollen every day.

The reason is because I started giving pollen to my cat, and then I tried it out and I loved the stuff!

(Dunno if it’s helping my cat, some days he appears to be free of allergies and other days he still wheezes. I don’t know if the pollen is doing anything or it’s just simply that some days there is less pollen in the air.)

So now I add half a spoonful of pollen to my morning smoothie every day.

And that basically is what I take every day.

I also try to sneak in some veggies into my diet, a little bit of yoghurt. You know, the usual kinda stuff that your mother was always preaching to you about.

And while you’re on this post, do check out some of my thrillers. You can read all about them here: Thrillers by Moi.

So, do you take supplements? Have you noticed any effect from them? Don’t hesitate to leave me a comment about this down below. I LURRRVE to receive (positive and non-spammy) comments.

If you enjoyed this post (I really hope you do!), maybe you will also like:

A Month at the Gym

Natural Skin and Hair Care Routine

Anti-Vaccinations 

Currywurst

My Thoughts on the Zero Waste Sustainable Lifestyle

I don’t know if you are aware that these days a new movement is starting to take the world by storm. It’s called zero waste, or a zero waste sustainable lifestyle.

Basically, what living a zero waste lifestyle means is using no packaging in all the products that you buy and use. Or at the very least only recyclable packaging.

Zero Waste Products

So people who have jumped onto this bandwagon usually use solid cleaning items such as solid soap, solid shampoos and solid conditioner.

They don’t buy or store food or anything else in plastic containers, preferring glass, wood, metal or any other natural material over plastic.

For the most part I support this movement.

Certainly I am all in favour of limiting your use of synthetic chemicals and plastics as much as possible. Not only are you reducing the toxic materials you bring into your home or consume, thus leading to a healthier lifestyle.

You’re also contributing to reducing all the garbage that spills out of our landfills and filling these landfills instead with organic materials that can actually decompose, rather than sitting there intact for thousands of years.

We all know that an excess of toxins is a scourge in our society and is one of the factors behind the growing numbers of cases of cancer.

I myself try to use glass, metal, wood and paper as much as possible. I go shopping with cloth bags. My all natural skin and hair care routines include mostly solid shampoos and natural plant-based oils.

I even make my own soap from scratch, by hand. Not a pour-and-melt affair but real, actual lye soap.

But sometimes I think this fanaticism for going all out zero waste just gets so absurd. And I got started thinking.

Why is a zero waste lifestyle supposed to be so good?

Is it only because it’s become fashionable and a lot of people are jumping onto this bandwagon now?

So many people do things, especially alternative things, just to be rebellious. Or just to look good in front of their friends. Or just because it’s what’s in at this moment.

So is a zero waste, sustainable lifestyle really so much better than a conventional one?

Or is it just some sort of hippie, rebellious, anti-establishment trend?

So many people do things without questioning them, just because other people told them it’s good, or that they should do it.

Why is it supposed to be more sustainable to use paper, wood or metal instead of plastic?

Of course it FEELS better, because it’s all natural as opposed to plastic which is not natural. Plastic is artificially created and comes from petroleum.

So I imagine it would be more HEALTHY, because you’re not using any kind of synthetic chemicals and thus you’re avoiding toxins.

But I don’t really see how it is more SUSTAINABLE.

For example, take metal. How is metal supposed to be more sustainable?

You have to send these poor, helpless men deep into these unhealthy mines where they risk their lives and sacrifice their health every day to mine metal.

What’s so sustainable, humane and healthy about that?

Metal isn’t recycled. Metal isn’t organic so it doesn’t degrade or decompose in landfills.

How about wood and paper? Yes they are healthier for you and they are all natural. And they do decompose naturally.

But think of all the trees you have to cut down to get wood and paper.

Although one YouTuber I saw said, “Actually, using wood causes MORE trees to be planted in my country, because in my country (which was of course some healthy Scandinavian country, Scandinavians are always ahead of the rest of the world, but I don’t remember which country it was) whenever a tree is cut down we plant TWO trees to take its place.”

Ok so maybe using wood and paper is sustainable in his country.

But so far this does not happen in the rest of the world, as far as I’m aware. And paper is recycled (in theory), but like everything else I doubt most of the paper is recycled here. Most probably just goes to landfills.

I do admit I haven’t done my research and I don’t have the faintest idea what happens to the garbage in my country or in my city. But I have seen in documentaries (vague documentaries that unfortunately I can’t cite because I don’t remember which documentaries they were, if you’re a stickler about people always revealing the source of everything they write about in blogs) that in most places around the world countries and municipalities don’t recycle.

(By the way if you’ve got some sort of physical evidence that I am wrong and that in fact most countries around the world do indeed recycle scrupulously, by all means, please, I’m completely open to you leaving a comment about it and showing me your evidence. If not, please refrain from leaving snide or picky comments about how I don’t document my blog posts accurately or cite the sources of my information. Your comment will not be approved. This is my blog and I write what I want in it. If you don’t agree with me you are free to not read it. Ok rant over.)

As I was saying, even if you do live in a country that recycles a high percentage of its rubbish, you still have to take into account the fact that the vast majority of the world doesn’t. So although as an ideal for a future utopian world, I don’t think it’s very sustainable or feasible at this point in time for most of us.

Then you could say that, well, paper is organic so even if it isn’t recycled at least it will biodegrade in landfills. Well I guess looking at it that way that could be true.

Still, when you buy something wrapped in paper, what do you do with the paper? You still throw it away, right?

I don’t think you’d reuse that tiny little piece of wrapping paper 100 times in order to be more sustainable, just simply because it wouldn’t last. It would soon tear or disintegrate.

Then how about wood? Wood is not recycled.

So if you throw away something wooden, which you will have to do at some point because wooden items don’t last a long time, at the most a few years maybe.

Maybe a wooden house can last several decades but in the end wood always deteriorates. So then what happens to the wood that you throw away?

Well once again zero wasters will say oh but wood is biodegradable so it will just biodegrade in landfills. Yeah but how long does that take?

So it is still not being recycled, even though it’s true it’s not as bad for the planet because at least it will biodegrade at some point.

But in the meantime, as you can’t recycle it, you still have to cut down more trees to create wooden objects to replace the ones that broke.

Then we’ve got glass. I like glass. I try to use it a lot because I like it.

Glass is recyclable and is probably one of the easiest things to recycle.

I don’t actually know the details about how glass containers are reused. But I imagine that the glass you throw away into the green coloured bins is being reused.

But most of the world doesn’t recycle. So you are only being zero waste by using glass if you live in a place where people recycle.

Or if you hoard up every single glass item that ever enters into your home in order to reuse it. But on the other hand, if you do that, you risk getting accused of suffering from hoarding disorder, as well as accumulating that other most undesirable scourge in life: CLUTTER! Gasp!

At any rate, even so, you are probably being more healthy if you use wood, paper, metal or glass, because you are not filling your home and your family with the toxic chemicals present in plastic. So you might want to say you are zero waste for health reasons.

But I don’t really see that it is more sustainable in the world we live in today. If the whole world recycled close to 100% of our waste and in every country they planted 2 trees for every tree that they cut down, then it could be sustainable.

In conclusion, much as I do in general believe in it and support it, I think it’s impossible to remove all the plastic from your life.

People say, well my ancestors lived for thousands of years without plastic.

Well, let me tell you, my parents were born over 90 years ago and they used plastic.

Just about everything that is essential in our lives is made of plastic. Most objects in our homes are made of plastic. Most of the things you can buy anywhere come in plastic containers.

Our food comes in plastic. Your mobile phone and your computer are made of plastic. The screen you’re reading this blog on is made of plastic or has a plastic support. You wouldn’t be able to read this blog if you didn’t use plastic at all.

Appliances are made of plastic. Medical equipment is made of plastic.

If you’re about to die from COVID-19 and the respirator is your only hope for survival you’re not gonna say, no don’t give me the respirator it’s made of plastic!

Buddhists say you should do everything in moderation. So yeah, I do think zero waste is good — in moderation.

And always respecting those who don’t agree with you.

If you enjoyed this post (I really hope you do!), maybe you will also like:

The New Mask-Filled World to Come

Homemade Soap 

My Current Almost All-Natural Low Waste Hair Routine 

Shikakai: My Recent Experiment

Trying Out Solid Conditioner for the First Time

As I mentioned in the last post, I’ve been trying to transition to a more ecological, natural, zero waste (or at least low waste) lifestyle.

So today it was time to try out solid conditioner for the first time.

Solid Conditioner

I went no poo and have been using solid shampoo bars and all natural handmade soap for several years now. So I tried to create a zero waste routine with solid shampoo and solid conditioner.

Last week I discovered we actually enjoyed the great good luck of sporting an eco-friendly, zero waste shop right here in my city. So I bought a solid shampoo and a solid conditioner there.

I already have several solid shampoos, so in this case it was just sort of like a matter of trying out a new shampoo, the way most people do every once in a while.

Just as you might at some point wish to try out a new conventional shampoo — say Pantene, for example, or Elvive — so for me getting a solid shampoo was the same. Except these were shampoo bars instead of liquid shampoos in plastic bottles.

However it was the first time I’d ever used a solid conditioner.

So first impressions, what did I think?

Well, I liked the shampoo but it was nothing to write home about, a typical solid shampoo. I’m used to using solid shampoos so it wasn’t anything out of the usual for me.

However the solid conditioner was…….. an experience, let’s say.

I rubbed it on all over my hair like I saw in videos. You can’t just splash a little bit onto the ends the way you would with liquid conditioner. You have to rub it painstakingly into your hair from root to tips.

It certainly is time consuming, it’s not like slapping a liquid on quickly. Perhaps if you have thin hair or short hair or not tangly hair or greasy hair it would be quick. But if you have coarse, long, dry self-tangling hair like me it just does not work. I NEED about 5 litres of liquid conditioner every time to get enough slip to get a wide-toothed comb through.

I did eventually get it detangled. But I think solid conditioner only works for people with short, fine, greasy non tangling hair.

I do admit my hair is by nature more tangly than the average. Because the average person doesn’t need as much liquid conditioner as I do either.

Once I got it detangled my hair did feel good, soft and silky.

But after that I NEEDED styling product. Because if not my hair would be dry and flyaway and staticky.

And I don’t have any all natural zero waste eco styling products. I made flaxseed gel last week and I put it in the fridge but it still went bad. So that really isn’t going to work for me unless I make tiny batches and make up a new batch every time I wash my hair. Because I only wash my hair once a week.

So I just grabbed any old styling cream.

So I dunno. I think I will keep using the solid conditioner, see if I get the knack for it. But if not I will use it up and then I won’t get any more.

Update: After my hair dried I was absolutely BLOWN AWAY by how my hair looked with this new solid conditioner. It was soft, silky, shiny, with shiny, bouncy curls.

I might add that my hair is naturally coarse and thick, rough wiry and very rarely ever looks shiny or silky.

But the most incredible thing about the conditioner was the SCENT!

My hair smelled like perfume.

And not like some chemically, formaldehyde-filled perfume from the department store either.

It smelled fresh and sweet and natural. Like I’d picked up flowers in a field and stuck them into my hair.

The scent lingered.

I don’t know how long the smell will continue to last. But at least for one day, that’s for sure.

Hair After Solid Conditioner

But no, it’s not so shiny and well-defined without help. Here in addition to using solid conditioner I also used a gel.

So I thought I’d give you the details of the solid conditioner I used.

It’s a local brand, so if you live in the US or the UK you probably wouldn’t be able to get it. But then again in the US and the UK you can get about a gazillion other brands that aren’t available here in Spain. One brand I’ve heard good things about (but never tried) is Ethique. It’s from New Zealand I think.

But at any rate, the name is Balsámica Natural Cosmetics.

This conditioner in particular says it’s made with ashwagandha, amla, coconut oil, cocoa butter and essential oils of cedar and rosemary.

Its other ingredients include cetearyl alcohol (an essential ingredient for making conditioners, if you don’t include this the oils won’t wash out of your hair and your hair will be greasy). It’s not a drying alcohol like ethyl alcohol.

So yeah, I would defo try out other solid conditioners by other brands and maybe even other products in this particular range. It’s a Spanish company. They do have an online store, but when I tried to get onto it it was offline. They also have a Facebook page which doesn’t really seem to offer a list of their products anywhere.

However their prices are very reasonable. I don’t remember how much the solid conditioner cost at the store but it was somewhere in the range between 5 and 9 euros.

So how about you? Have you tried solid conditioner before? Or experimented with the zero waste lifestyle? I’d love to hear about your experiences. Do leave me a (positive, non-spammy) comment about it down below.

And if you enjoy reading, especially if you like fiction, I’ve got some exciting thrillers you might want to check out, here at Thrillers By Moi.

If you enjoyed this post (I really hope you do!), maybe you will also like:

Homemade Soap

Bentonite Clay for Hair 

All Natural Skincare

Fried Aubergines Lite (Because eating is still fun)

My Current, Almost All-Natural, Low-Waste Hair Routine

Essential Oils for Hair

I thought I’d start off the new year with a new series on All-Natural Hair Care. So here is the first instalment.

I have been no-poo (that is, no shampoo) for about 3 years now. You can read about how I transitioned to no-poo here.

Recently I’ve also decided to add zero-waste to my hair and general routine as well. That is not the easiest thing in the world to do when you have dry, frizzy, curly hair.

Ayurvedic Herbal Powders

However, after about a full TWO YEARS! of experimenting and watching a gazillion YouTube videos, I think I’ve FINALLY found a minimalist, natural and low-waste (not zero-waste, however) hair routine that works for me.

It’s not the simplest, most minimalistic, most low-maintenance routine that’s ever existed but then again I figure girls with curly hair can’t follow the same routine as people with straight hair. Curly hair is drier so it needs more care. And my hair in particular is especially tangly (I’ve always called it self-tangling hair because it tangles around everything), with a naturally coarse, rough, wiry texture.

So here is my………

Complete All-Natural Zero Waste Hair Routine:

Week 1:

  • I begin by brushing my hair with a wooden brush. I brush it right side up and then upside down to get out tangles and stimulate hair growth.
  • Then I rub in hair oil. On the scalp I use a concoction that I made myself. In a jar I mix castor oil + olive oil + a teaspoon of bhringraj and let it sit. When I’m going to oil my hair, I just pour out the required amount into a small bowl and add a couple drops of rosemary and tea tree essentials oils. When it’s getting low on oil I simply add more oil. After a few weeks I throw out the bhringraj (I have no idea how long it would be good for though or if it ever goes bad) and add a new teaspoonful of this herb.
  • On the lengths I use coconut oil or olive oil. Then tie in a bun.
  • I leave this on for 2-3 hours. You can also leave it on overnight and sleep on it if you prefer.
  • Wash with solid shampoo or all-natural handmade soap.
  • Condition with solid conditioner.
  • Style as usual.

Hair OIling

Oiled Hair

Notes:

*I’ve been experimenting with solid conditioner for a few weeks now and I’m a bit on the fence about it. On the one hand, I like that it’s zero-waste, all-natural and silicone-free. And it smells fantastic.

But on the other hand, it takes forever to rub it through my extra-tangly, self-tangling rough, coarse hair. It also doesn’t leave my hair feeling as soft and hydrated as a cream conditioner.

I’ll be putting up a separate post soon all about solid conditioner. So stay tuned for it!

Since my hair is so naturally rough and coarse, I have a hard time trying to make it soft. If your hair is fine and naturally soft, it might work better for you though.

For this reason, even though I love the concept, I find that every now and then I still need to fall back on a creamy, liquidy conditioner in a plastic bottle, or my hair gets very dry, frizzy, flyaway and extra tangly (and it’s already tangly enough as it is!).

Week 2:

  • Don’t oil hair. But do brush it.
  • Wash with a mixture of aritha + sidr or shikakai and methi (ground fenugreek), mix with lemon juice or flaxseed gel or warm water to form a dense paste similar to shampoo. Apply like shampoo, leave on a couple minutes and rinse out.
  • Mix amla and brahmi with warm water to form a thick paste similar to conditioner. Apply to length of hair, detangle, leave on for 5 minutes and rinse off.
  • Style as usual.

Notes:

*I have been using sidr instead of shikakai because I’m able to get it at the same online shop where I buy the rest of the powders. And because shikakai can sting your eyes.

I also wasn’t too wowed by shikakai when I used it before. But if you can’t find sidr in your neck of the woods, it’s fine to use shikakai as well.

Sidr is the powdered leaves of a tree that grows in Persia (Iran) and the Middle East. Like aritha, it has saponins, natural soap, so it cleans your hair gently.

To make flaxseed gel, simply boil a teaspoon of flax seeds in a cup of water for about 15 minutes. Then strain out the flax seeds with a strainer, cool the liquid down until it’s warm and doesn’t burn and use it to mix up the herbal shampoo.

Because I have curly hair using some sort of styling / curling / hold product is a must. If I want to be completely natural and zero-waste I use flax seed gel by itself. But I get bored always using the same product so I like to switch things up. Then I do need to add in some commercial product in a plastic container.

Where I Buy These Products

I buy these ayurvedic powdered herbs at an online shop here in Spain. If you’re lucky enough to enjoy the presence of an Indian community in your city, they’re sure to boast physical shops where you can acquire them as well.

I’m not that lucky as there are perhaps only 2 people of Indian origin living in my part of the world. But if you happen to live in Barcelona, where I used to live, you can scout the shops of the Raval. I used to buy these herbs there.

It’s not easy to find solid conditioner here in Spain, unless you live in a large city. I don’t. But I was soooooo lucky to find an ecological, green shop downtown. It’s called Verda.

However they are also available on Amazon.

Aloe Vera Scalp Massage

Every once in a while, when I get in the mood, I’ll massage my scalp with some aloe vera gel. I add rosemary, lavender, mint and tea tree essential oils in the gel. Then I rinse it out after a couple hours in the shower. It’s a gel and not an oil so it doesn’t leave hair greasy, so it’s not necessary to use shampoo.

Aloe Vera Gel for Hair

My son prefers to do this after he washes his hair. It really doesn’t make any difference in the appearance of your hair, it won’t make it look greasy, so you can do it either way.

Henna

I henna my hair about once every 2 months. Because…….. I have a few grey hairs already! Hush, it’s a secret. Don’t tell anyone.

Hennaed Hair à la The Ring

My hair doesn’t turn out too red because it’s naturally very dark. Although I imagine if I hennaed it more often it would get redder. But I’m too lazy for that haha. It also looks redder in the sun.

Hair With Henna

I love henna hehe.

Heatless Hair Straightener

Although I LOVE having curls, I can get bored with them always looking the same and I want to change them. Then I make braids and thus stretch the hair out a bit to create beach waves.

My hair is very healthy. It’s about to the middle of my back. And I never have split ends.

So I think this routine is working quite well for me. [:smile hehe:]

And now that we’ve reached the end of this post, if you feel like doing some more reading I’ve got plenty of offerings for you. Check out my collection of thriller novels and horror stories here at Thrillers By Moi.

If you enjoyed this post (I really hope you do!), maybe you will also like:

Homemade Soap 

Natural Skin and Hair Care Routine

Castile Soap and Coconut Milk for Hair 

Proper Hair Oiling For Long, Drop-Dead Gorgeous Locks 

Homemade Soap

Following on my previous post on soapmaking, here is a selection of some of the homemade soap that I’ve made.

How to Make Soap Homemade Soap

I usually make goats milk soap, because I LOVE goats milk soap. It’s moisturizing like you wouldn’t believe, hydrating, great for both skin and hair. Plus, it helps a great deal with certain skin problems like eczemas, rashes or sensitive skin.

But in this photo above is the only water soap that I’ve made. As you can see, unlike goats milk soap, water soaps can come out light in colour (depending on the oils used). Goats milk soap always comes out yellow, tan or brown because the sugars in the milk caramelize during the soapmaking process.

The ingredients of the soap pictured above are: olive oil pomace (I always use olive oil pomace, because it’s cheaper), coconut oil and a few drops of castor oil, lye, water and rosemary essential oil.

Soapmaking Handmade Soap

This is the very first homemade soap that I made in my latest soapmaking venture. I used to make homemade soap years ago, when I lived in Barcelona. But I hadn’t done that in years.

This soap is the one all my friends are crazy about, and is the one most in demand in my circle of friends and acquaintances. The ingredients are: olive oil pomace, coconut oil, castor oil, lye, goats milk and rosemary and mint essential oils.

Homemade Soap Charcoal Soap

This curious little soap was my attempt to make homemade charcoal soap using…… homemade activated charcoal!

Activated charcoal is supposed to have multiple benefits. It’s good for acne, helps to regulate oil production in your face, exfoliates…… Usually people buy activated charcoal. But it’s pretty pricey for an ingredient you’re only going to use just once in just one of your homemade soaps. So I thought I’d try making my own.

Activated charcoal is called activated when it comes from plant sources. Well, I figured, plant sources are fairly abundant. In fact, I happened to have a huge stalk full of thick leek leaves that were too old and thick to use as food. So I cut them into large chunks and stuck them into a glass baking pan in the oven. I baked them until they charred and turned to charcoal. Then I took them out (when they got cold, of course) and pounded them in a mortar into fine charcoal powder.

And that is what I dumped into the above soap. I added it to the soap after it was already cooked, using the hot process soapmaking process I detailed in my previous post.

Thus, the ingredients of the above soap are: olive oil pomace (I use a lot of olive oil because I live in Spain the land of olive oil), coconut oil, goats milk, lye, activated charcoal made from leek leaves and rosemary essential oil.

These are 2 soaps in moulds.

These 2 chunks are 2 samples of the homemade soap I’d originally made in Barcelona years ago. As you can see, they’ve darkened quite a bit over the years. But they are still in perfectly good shape and perfectly usable.

I’m not too sure what ingredients they have, because I made them years ago, but I do recall that they are goats milk soap.

Homemade Coconut Oil Soap

These peculiar lumps are some of my fave soaps, next to my signature olive oil soap (second picture above). I absolutely LOOOVEEE LOVE LOVE this homemade soap for my hair. They are THE most moisturizing, yet at the same time, they leave my hair clean and grease free, so I can go more days without washing my hair.

This is a pure coconut oil soap, so the ingredients are simple: coconut oil, lye, goats milk and rosemary essential oil. I add rosemary essential oil to every soap that I make to prevent the oils from going rancid.

Homemade Soap Olive Oil Soap

This is a chunk of my and my friends’ favourite homemade soap. It’s from the batch of olive oil soap. I kept this for my own use and gave the others, which had a more regular rectangular shape, away.

So now you have seen a sampling of some of the soaps I’VE made, how do you feel about making your own soaps? You can find step by step instructions on how to make soap in my previous post, Soapmaking.

And if you love relaxing with a good book at the end of your day, I’ve written a few thrillers so, if you’re into creepy, scary, suspenseful novels, I’d love it if you’d check them out here: Thrillers by Moi.

Have you made some homemade soap of your own? Or maybe you’ve got some questions. Do leave me comments at the end, I LURRRVE to receive (positive, non-spammy) comments!

If you enjoyed this post (I really hope you do!), maybe you will also like:

Soapmaking

Natural Skin and Hair Care Routine

Bentonite Clay for Hair

Caves of Nerja

Soapmaking, How to Make Soap At Home

I decided to learn soapmaking, or how to make my very own handmade, homemade soap at home.

Soapmaking Handmade Soap

Ever since I went on a no-poo craze, I’ve been discovering all the nefarious effects of using chemical filled detergents. Chem-filled detergents are everywhere: in your shower gel, your shampoos, your liquid soap and liquid hand soap, in your laundry detergent, your dishwashing liquid, everywhere!

And chemical laden detergents are harsh, drying and irritating. They are produced through an artificial, unnatural process that you can’t exactly imitate in your kitchen, using harsh ingredients you wouldn’t exactly wish to stock up on in your kitchen.

And if you go to the store or supermarket and buy a bar of soap, you’re not doing much better. Because these commercially-made, factory-made bars of soap also contain a lot of detergents and chemicals.

At any rate, if you should choose to buy a bar of soap, at the very least, do your research and check out the ingredients list.

Here in Spain, soaps are not required to list their ingredients. But if you’re lucky enough that your supermarket soap actually does have a list, pay attention to make sure it doesn’t contain any sulfates in it, such as sodium laureth sulphate or sodium lauryl sulphate.

These are the most common sulphates, but sulphur compounds come in many forms and guises. You might have also seen ammonium lauryl sulfate or disodium laureth sulfosuccinate listed on some bottles. These are also sulphates in disguise.

I won’t go into the details about why sulphate detergents are bad for you, as you can find more than enough information on the subject on the internet today. Mainly, what this post is about, is the healthy, natural, homemade alternative: soapmaking at home, that is, making your own soap!

Why Is Soapmaking Good For You?

Why is it so good to make your own soap?

Well, first of all, it’s fun!

Next, you can use your own handmade soap to replace all those expensive shower gels, shampoos, hand soaps, liquid soaps, dishwashing liquids and laundry detergents.

Finally, YOU are the one with FULL CONTROL over what substances you are spreading on your skin or hair. After all, skin breathes. What you slather onto your skin DOES make its way into your blood stream, at least to some extent (depending on the size of the molecules involved).

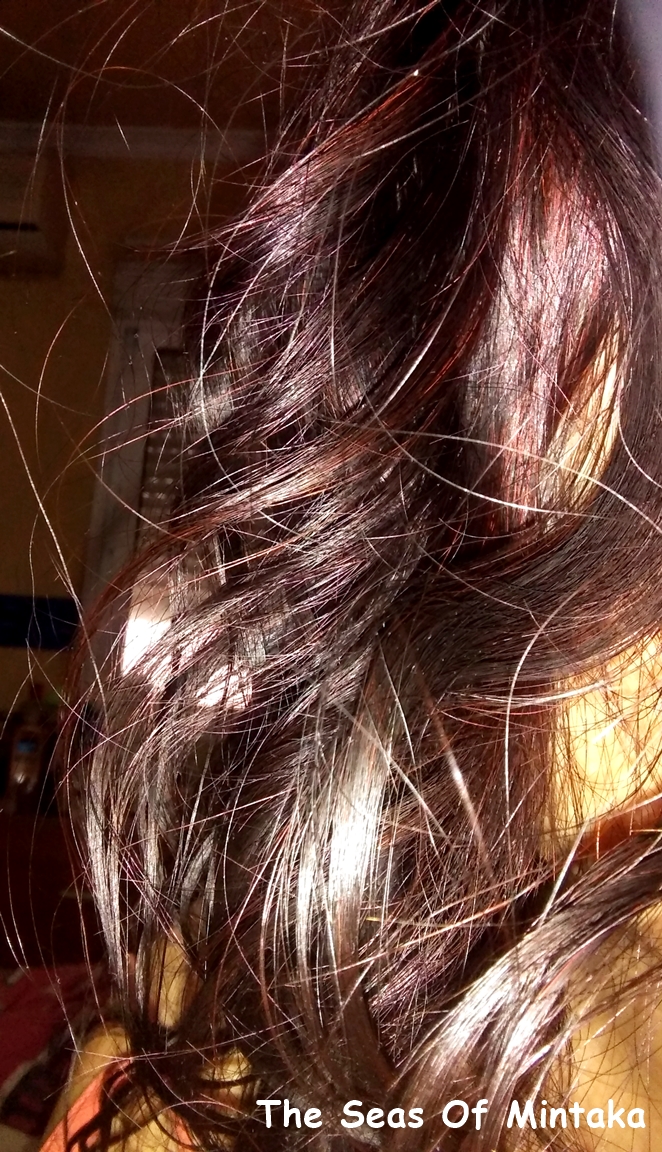
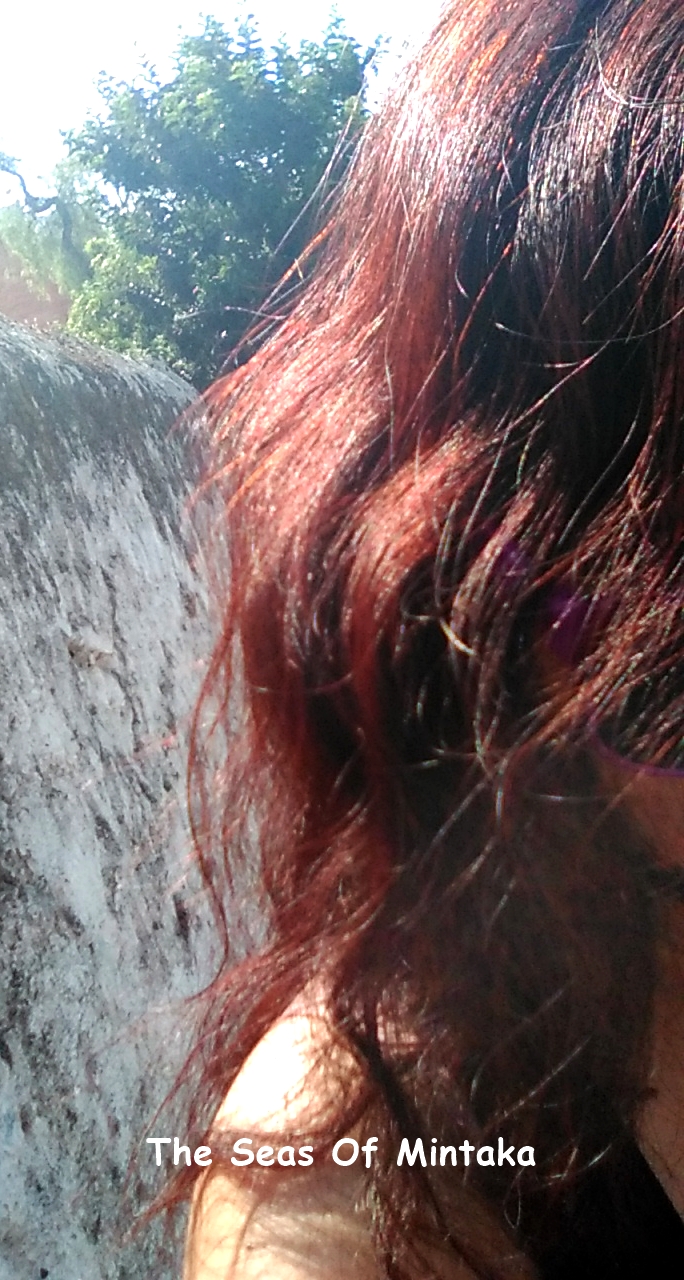
And, of course, as most people could probably attest to, what you use on your hair does affect what your hair looks like and how it acts. Right?

So wouldn’t it make sense to use only the highest quality, purest, most natural, best ingredients on your hair?

So following, I’m going to describe the series of steps that I use to make my own soap at home.

Scared of Lye?

A lot of people are scared off from soapmaking because they are afraid of lye. Well, here in Spain, lye has been used for a long time as a drain cleaner. In this case, hot water is actually added TO the lye, which produces an explosive reaction. Since we get used to this explosive reaction, no one is scared by it anymore.

But in order to make soap, all you need to do is to quietly dissolve lye crystals VERY SLOWLY in water. When done in this order, no explosive reaction occurs.

So without any further ado, these are the basic steps I use to create MY VERY OWN HOMEMADE SOAP, using the hot process method in a crock pot.

You don’t need to use a crock pot. Before I had a crock pot, I used to use a double boiler. But for me, a crock pot is THE WORKS haha! It makes your soapmaking life 1000% easier.

I’ve also cooked soap in the oven, however, since some oils are hard to saponify and need more heat and I have a crock pot with a low setting only. I only use it for soapmaking, and have never used this crock pot for anything else.

I personally like to use the hot process method, where you cook your soap using heat. The other method, called the cold process method, is faster and simpler, but I rarely ever use it, as I personally don’t like it.

Why I Prefer Hot Process Soapmaking

The reasons I prefer the hot process soap method are the following:

  • shorter curing time, you can use a hot process soap immediately but I like to cure it for about 2 weeks. However, a cold process soap requires a minimum of 6 weeks’ curing time, and I’m just too impatient to wait that long haha!
  • you have no difficulty with essential oils or colorants reacting during the saponification process with hot process, because you add these ingredients AFTER the soap is already cooked and saponified
  • no alien brains hehe!
  • no other weird reactions either
  • you don’t have to worry about accidentally touching your raw soap and getting a soap or lye burn, because by the time the soap is cool enough to touch, all the lye has already reacted with the oils, and no lye remains to burn you

Some people prefer cold process soaps because they produce a smoother, more exquisite and refined looking cake, and it is a lot faster. But once again, like I said, you trade a faster soapmaking time for a longer curing time.

Steps for Making Soap

1.Measure out your oils.

You can choose from a huge variety of oils. Because exotic or harder-to-get oils can be expensive, and I live in Spain, I usually limit myself to the most basic oils: olive oil, coconut oil and castor oil.

I like to use olive oil pomace (in Spanish, aceite de oliva de orujo), because it’s both cheaper than the extra virgin variety, as well as having a higher percentage of unsaponifiables (molecules that don’t react with the lye and therefore remain as oils, which makes for a richer, creamier, more hydrating and moisturizing soap).

However, DO NOT EAT OLIVE POMACE OIL! It’s not meant for eating, and is produced using a chemical process that leaves behind some substances that not only taste bad, but might also be bad for your health if you eat them. (I’ve been trying to find out why you can’t eat them, but it’s okay to slather them on your skin, but I can’t seem to find any information related to that. I can only assume that your skin doesn’t absorb these unhealthy substances. Perhaps the molecules are too large.)

Some people do eat olive oil pomace, but nowadays it’s become very difficult to find it even here in Spain, because it’s been forbidden by the Spanish government for culinary use. You can still use it in soapmaking though.

Olive oil confers moisturization to your soap and makes for a very hydrating soap. It’s good for people with dry skin or dry hair.

Coconut oil is deeply cleansing, and produces absolutely THE RICHEST, CREAMIEST lather. It’s not particularly moisturizing, though. That’s why I like to combine olive oil and coconut oil in any soap that I make.

I like to add a few drops of castor oil as well. It makes for a soap that feels creamier and lathers up more easily. However, being slightly more expensive and harder to find, I don’t use it a lot.

So as I was saying, measure out your oils. You need to know how much oil you are using so you can calculate the amount of the remaining ingredients. I like to use this soapmaking lye calculator.

It might look quite complicated, but it’s actually quite easy to use. Simply follow the steps, which are outlined there.

The usual percentage of water in relation to oils is usually 38%. You might want to use a lower proportion of water if you want your soap to cure more quickly. Or a higher percentage if you are going to cook your soap (ie. use the hot process) and you plan on using high temperatures, which can make your water evaporate.

Most people superfat their soaps approximately 5-10%. If I make a pure coconut oil soap for skin or hair, I like to superfat it at 20%, however, because coconut oil is not particularly moisturizing, and this amount of superfat creates a more hydrating soap.

Superfatting is the amount of “extra” oil that you add to your recipe, which will not react with your lye and will therefore remain behind in your soap, in order to hydrate your skin.

If you wish to create a soap for cleaning your house or laundry, you want to leave the superfatting at 0%, because you don’t want to leave any oil behind on your bathroom sink or in your clean clothes.

2.Measure out your liquids.

Usually your liquid will be water. I like to use mineral water, although some people use distilled water and I imagine you could use tap water as well. But don’t take my word on it about the tap water, as I’ve never used it.

You can also use filtered water or boiled water, however. Once again, I have not tried this.

In fact, I very rarely use water at all. I LOVE LOVE LOVE goats milk soap, and I pretty much almost always use goats milk instead of water. I (and my friends also) find goats milk soap just SOOO much more moisturizing and soothing than water soap.

Goats milk soap is also great for a number of skin affectations, such as eczema.

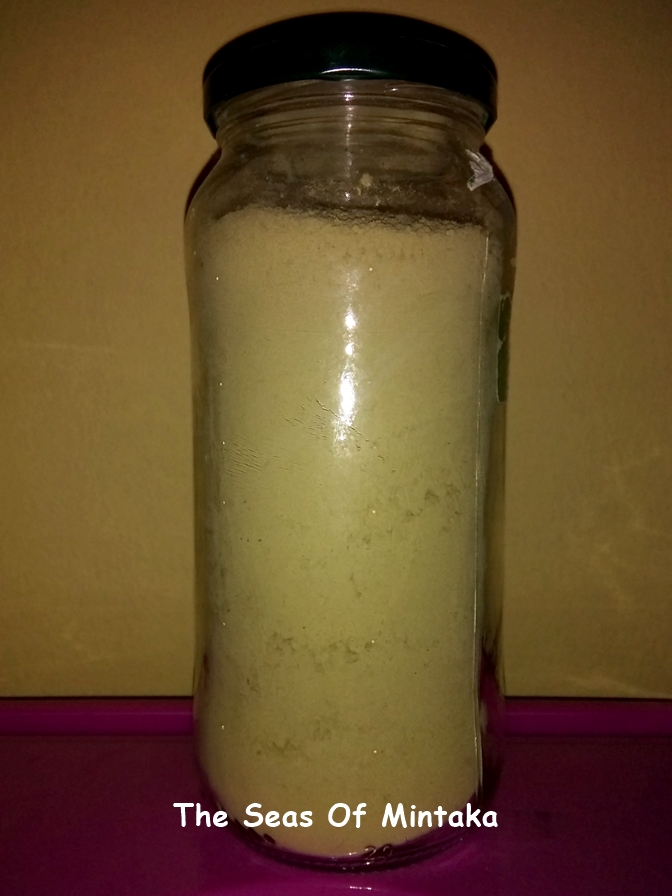
3.Measure out your lye.

Use the amount proposed in the lye calculator I’ve linked to above.

I place my lye in a small porcelain bowl.

Here in Spain you can find lye at any supermarket or drugstore. However, I’ve read that it’s hard to get in the US. If you live in the US, I imagine you could try a hardware store (it’s sold as a drain unblocker), or simply order online.

4.Once all your ingredients are measured and set out in preparation, you can begin to actually create your soap.

I like to begin by pouring the oils in my crock pot and turning it on low. (If you prefer to make cold process soap, don’t turn on your crock pot.)

If I am using any solid oils, such as coconut oil in the winter or cocoa butter, they will melt in the crock pot.

5.I place the liquids (water and/or goats milk, or any other milk that you might prefer, such as coconut milk) in a stainless steel container. I thought I’d taken a photo of the container I use but apparently I hadn’t, since I can’t find any such photo. I just use a typical lidless stainless steel cup like the kind people use to pour hot milk into coffee, with a little spout.

I then place the stainless steel container in the sink, if possible inside a large pot of cold water. Make sure the cold water doesn’t get into the stainless steel cup, of course!

This is to keep the liquid as cold as possible while it is reacting with the lye. That’s not such a problem if you are using water. However, if you are using goats milk, goats milk cooks with the heat! And when it cooks, it turns brown. (I can’t remember why it does that, I think the sugars in it caramelize or something.)

So the cooler the goats milk remains, the less it browns.

6.I get all goggled up.

I am very careful and I’ve never ever ever had any accident using lye. Here’s hoping it stays this way haha.

However, I also live in a safe home without babies or toddlers or elderly folk with Alzheimers. My teenage sons know better than to get in the way when I’m soaping. If that is not your case, make sure all pets, babies, toddlers and violent angry persons are out of the way before you begin the next step.

Getting goggled up means I put on rubber gloves, long sleeves, closed toe shoes and goggles. I don’t use any special goggles, the ones I use are from the dollar store and are the kind kids use to swim in the swimming pool.

7.Add the lye crystals little by little to the water or goats milk using a plastic spoon.

The goats milk will turn yellow, then brown, so if you see this happening, it is normal. It will also smell like ammonia. Supposedly, the smell will go away once the soap is cooked. But I find occasionally a faint whiff still remains.

Stir GENTLY. This is to make sure all the lye dissolves.

And of course, don’t breathe in the fumes haha! Don’t worry, it smells so bad, you wouldn’t want to anyway.

Then wait until the cup is cold enough to handle before moving on to the next step.

8.Once the lye water/milk is cool enough to handle, I pour it GENTLY into the oil mixture. That is why it’s so useful to use a cup with a spout.

Soapmaking Crock Pot

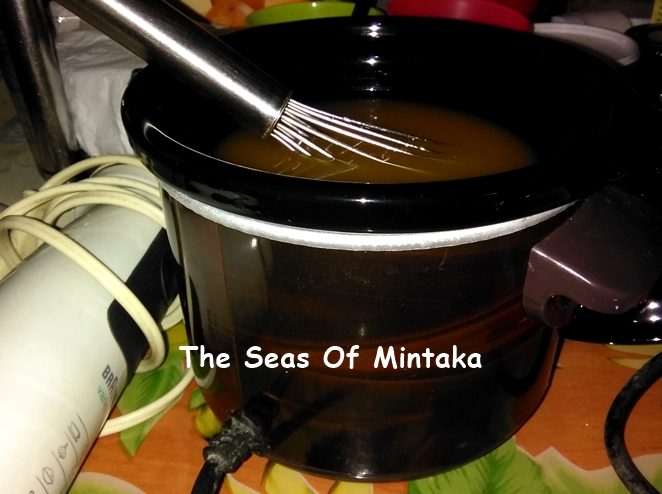
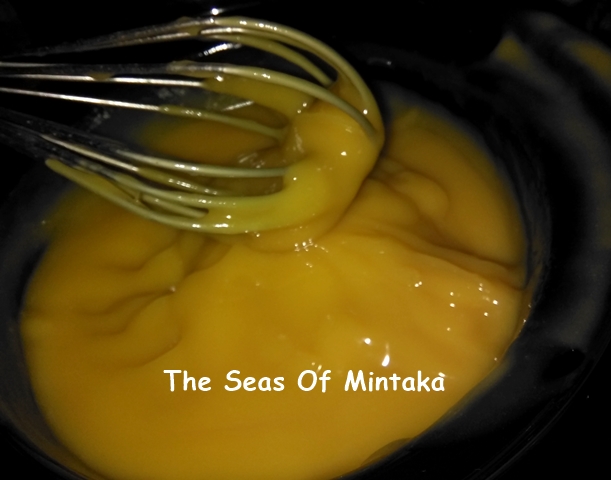
9.Using a metal whisk, I start to gently stir the mix together.

How to Make Soap Whisking

No egg beating now hehe. The lye is still raw in there, which means it can BURN you if you touch it or it splatters out.

After I’ve mixed for a bit, I start with the stick blender. Stick blend for a few minutes, then turn off the blender and just stir with it for a few minutes. Then turn it on again.

How to Make Soap Stick Blender

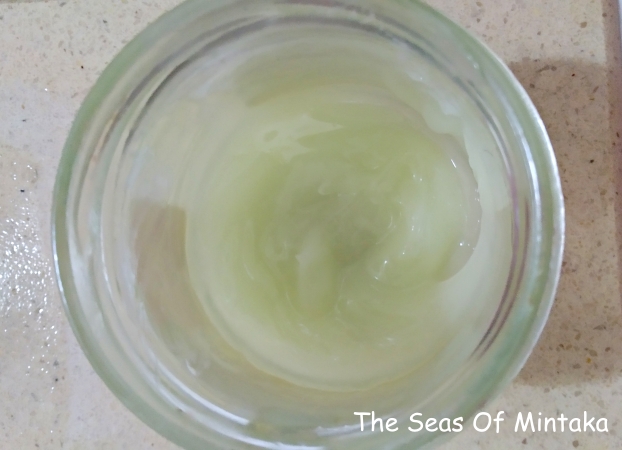
I stir/blend until reaching trace.

Depending on the oils used, this can take from about 15 minutes to over an hour. So if it’s not happening yet, don’t despair. It WILL happen. You just happened to pick some rather slow oils haha.

How to Make Soap Trace

I can’t remember now, off the top of my head, which oils took longer to reach trace. But some do take longer than others, so if yours is taking a long time, not to worry.

Trace is when the mixture starts to stiffen up a bit, and to hold its shape when it drips off the blender.

You can reach light, medium or heavy trace. I like to reach medium trace, because it seems to take a little less time to cook after this.

Soapmaking Trace

If you were making cold process soap, at this point, you’d be finished. You would simply need to add any fragrances, essential oils, colorants or other additives and pour into moulds.

But since I’m making hot process soap, I would continue on to the next step.

10.At this point, having reached trace, I cover the crock pot and set it on low.

I’ve never had any problems with the soap cooking too hot and boiling over (what some people call a volcano). But I have a crock pot with a low setting. If your pot is hotter than mine, you might need to be on the lookout for volcanos.

A volcano is simply when soap boils over, explosively. You don’t want that to happen. You can prevent that by hovering near your crock pot and checking it frequently (every 5 minutes or so).

It usually takes about 45 minutes to an hour for my soap to cook. How long it takes would depend on how hot your pot is, I imagine, as well as the recipe you used.

If it looks as if the oils and water have separated in your soap at some point, actually, I’ve been told that clear liquid that separates out is actually natural glycerine (which is a natural by-product of soapmaking) and not water. Simply give it a good stir to mix it back in again.

11.Once the soap has gelled completely, it’s cooked.

Gelling is a process whereby the soap starts to look more transparent (as opposed to looking more opaque, before it’s gelled).

Some people try the tongue zap test to see if the soap has cooked. You probably don’t want to do that. Soap tastes foul at the best of times! You probably also don’t want an electric shock on your tongue.

I simply make sure the soap has gelled completely. Give it a good stir using your wooden or plastic spoon or spatula, to make sure it looks transparent throughout. (It won’t actually look clear, it will still be coloured. Simply, it will have a transparent effect, similar to glycerine soap.)

12.Once it has gelled completely, I take the porcelain pot out of the heating shell and set it on the counter to cool down.

Like any pot that you’ve been cooking (food) in, it’s hot! So be careful.

If you are using a double boiler instead, or the oven, simply take it away from the heat source and leave it to cool somewhere, about 10-15 minutes.

You don’t want to make it too cold, or it will become hard and difficult to handle.

Some people add a bit of yoghurt at this point, to make it softer and easier to pour. I never remember to buy yoghurt before making soap, so I’ve never tried this. However, sometimes I do add a few drops of goats milk, and it does soften the soap and make it a bit runnier.

13.Once it’s cool, I like to add essential oils.

Because it’s goats milk soap, it’s already naturally brown, tan or dark yellow in colour, so I don’t usually interfere with the colour. If you have made a water soap, however, you might like to add colorants at this point.

I usually always add rosemary essential oil, to prevent the oils from going rancid.

Then I also add some essential oils for fragrance. I LOVE mint!

Mix in the oils and/or colorants and stir.

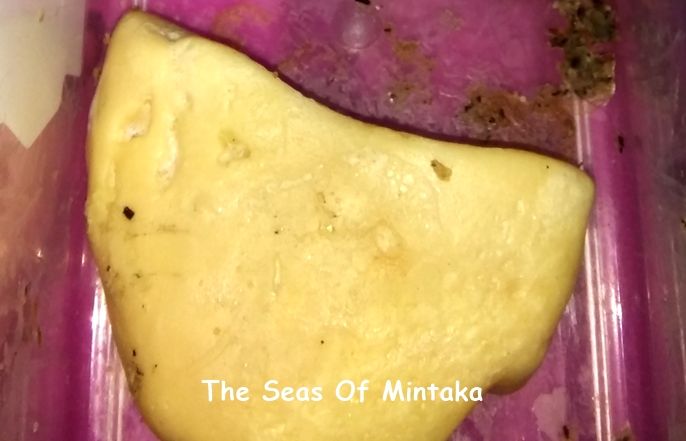
14.Pour into moulds.

Soapmaking Mold

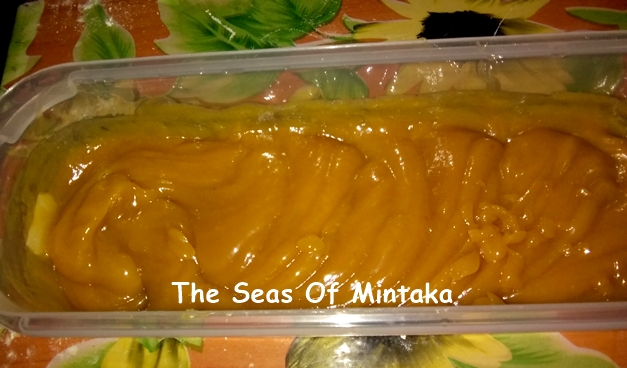
Bang the mould down on the tabletop a few times (not too vigorously!) to get out the air bubbles.

15.Set into a cool, dry place to cure.

You can usually use the soap immediately after soapmaking, once it’s completely cold. But you will get better results if you cure it for a minimum of 2 weeks.

In order to conserve your newly created handmade soap as long as possible, always store it in a cool dry place when you’re not using it. Don’t keep it in the shower.

How to Make Soap Homemade Soap

In the next post, I’ll show you some pics of a few of the soaps that I’ve made recently.

And while we’re at it, not to sound like a sleazy saleslady but I’ve written a few thrillers so, if you’re into creepy, scary, suspenseful novels, I’d love it if you’d check them out here: Thrillers by Moi.

So, do you think you’ll try out this adventure and make a few soaps of your own? Feel free to tell me about YOUR soapmaking experiments. How did your soaps turn out? Do leave your comments below. I LURRRVEE to receive (positive, non-spammy) comments!

If you enjoyed this post (I really hope you do!), maybe you will also like:

Natural Skin and Hair Care Routine

Bentonite Clay for Hair

Castile Soap and Coconut Milk for Hair

Malaga in Winter: Mexican Flame Vines

Castile Soap and Coconut Milk for Hair

I’d read about using castile soap and coconut milk for hair, and I wanted to give it a shot.

I’ve been on a no ‘poo craze for the past few weeks. Now three weeks since I last dropped a drop of conventional, commercial shampoo on my hair and counting.

I’d recently tried shikakai and bentonite clay for washing my hair, you can read about the results here: Shikakai and Bentonite Clay for Hair.

I was very happy with bentonite clay (not so much the shikakai, but you can read about why in this post on shikakai) but, just as people who use ordinary shampoos have a grand variety of hundreds of shampoos to choose from, why couldn’t we no ‘poo-ers also enjoy that luxury? So I wanted to try out new methods.

I’d used natural, handmade shampoo bars before, but they are hard to get where I live and I have to order online from the US. Well, I’m sure natural, handmade soaps are available online from Europe as well, but I wasn’t going to go to the bother of thumping about all over the internet for them. (I know Lush have them, but some of them contain sodium lauryl sulfate which is a chemical we are definitely trying to avoid.)

I could occasionally find some at handicraft or medieval fairs, but those only come by about once a year and then what will you do to get natural handmade shampoo bars in between?

So I turned to castile soap and coconut milk.

Now, I might add that the famous Dr Bronners castile soap is NOT available here in Spain. Or at least not in my city. Perhaps if you live in Madrid you can find it, you can get anything in Madrid.

But I live several hours away from Madrid, so going shopping there is not an option for me.

However, I could easily get a hold of natural soap bars, castile soap bars. Local housewives here make them with olive oil and sell them to local drugstores for a very low price.

And Jabón Lagarto, another natural choice for those of us who live in Spain (although it’s made from beef tallow so vegetarians might want to avoid it), can be obtained for literally pennies (or, well, cents) at any bazaar or supermarket.

So I decided to melt Jabón Lagarto (but it could have worked just as well with the local handmade olive oil soaps—which, when you come right down to it, is indeed the original pure olive oil soap that gives its name to castile soap (Castile being a region in Spain)) in hot water.

I chose Jabón Lagarto because it is available in soap flakes, whereas if I were to use a bar of local handmade all-natural castile soap, I would have had to grate it by hand, since I don’t own a food processor.

I used a proportion of one cup of soap flakes to one cup of hot water. That turned out to be too much, since it’s a strong soap, and next time I will use only ½ a cup of soap flakes to 4 cups of liquid (taking into account that coconut milk is a liquid too).

When you use too much soap, the resulting liquid soap is not liquid! It’s solid. Hence the need for the right proportion of soap flakes. But if you use too much, just add more liquid.

I boiled 2 cups of water on the stove. Then I poured in the soap flakes and stirred and stirred and stirred. I took the water off the stove, but the soap didn’t melt and in the end I had to leave it simmering on the stove on low heat.

When all the soap had melted, I poured in a can of coconut milk. The can contained 2 cups of coconut milk, thus making a total of 4 cups of water and 1 cup of soap flakes. When it cooled down, it was solid, and I needed to pour in 3 more cups of water to get it to the consistency that I wanted. Hence, the correct proportion, at least for my soap, was ½ cup of soap to 4 cups of liquid.

The original mixture was a semi-transparent pale yellow liquid, sort of like thick apple juice. But with the addition of the coconut milk, when it dried it turned into a thick white liquidy thing.

I poured it into empty shampoo bottles that we happened to have lying around.

You can also add in a few drops of oil or essential oils for added benefits and fragrance. I’m too lazy to do that haha.

However, you can read up on a few of the natural, plant-based oils that I use in skin care in this post:

Last night I washed my hair—just my scalp, not the length—with a few drops of this natural liquid soap. And the results?

Hair Castile Soap Coconut Milk

I love my hair! It’s soft, bouncy, doesn’t feel or look in the least bit greasy and my curls are well defined.

Castile soap with coconut milk is definitely going to form a regular part of my natural, no ‘poo hair care arsenal.

And in addition, I’m now getting my kids to wash their skin and hair with the natural liquid soap that I made, so we get the additional benefit of weaning the whole family off of chemicals.

And while we’re at it, not to sound like a sleazy saleslady but I’ve written a few thrillers so, if you’re into creepy, scary, suspenseful novels, I’d love it if you’d check them out, here: Thrillers by Moi.

So what about you? Have you tried the no ‘poo method yet? Are you also weaning your family off of chemicals? What results have you been getting? Do tell tell! As you know, I LURRVE to receive (positive, non-spammy) comments!

Hair Castile Soap Coconut Milk

If you enjoyed this post (I really hope you do!), maybe you will also like:

Henna

Bentonite Clay

Thrillers by Moi

Anti-Vaccinations: Dying To Be Natural

Bentonite Clay for Hair

I’d been trying a few no ‘poo methods, and bentonite clay was my latest.

As I explained in this post, Going No ‘Poo, I’ve recently been on, as you can gather, a no ‘poo craze.

In previous posts, I’ve described a few of the other methods I’d tried, and clay was up next.

I’ve already been hennaing and oiling my hair for ages. But I was still using regular shampoo and conditioner.

Well, to tell the truth, I’d tried natural shampoo bars for a while, but although I was quite pleased with the results, they were fairly hard for me to get a hold of, as they are (surprise! surprise!) not sold in physical shops here in Spain (or at least not in my city, which might surprise no one since I don’t live in a major, large city).

So I started doing research on the internet into no ‘poo methods. Of course, in addition to bentonite clay, one of the first suggestions I encountered was baking soda and apple cider vinegar. The classical no ‘poo panacea.

However, I’d tried that once for about three weeks and my hair ended up a dry, tangled, straw-like, birds-nest mess. (Nope, no oily transitioning period for me, just dry dry dry!) So I gave that up.

(I’ve since read that often curly hair just doesn’t agree with baking soda. Of course, that is not the case with everyone, but it clearly does not agree with me.)

Looking into the internet a bit more, I discovered posts which explain that baking soda does indeed have a tendency to dry your hair out due to its extreme alkalinity. Now, our skin and scalp are naturally acidic, so extreme alkalinity is, needless to say, absolutely no good for us and just the opposite of what nature intended for us.

I figure, baking soda would probably still work for people with oily scalps and hair, but my hair is naturally thick, coarse, wiry and dry as a whistle (or perhaps a thistle hehe). So it only stood to reason that it wouldn’t work for me.

Then, I read about bentonite clay and rhassoul (pronounced grrrassoul, like a growl deep in your throat). (Just showing off that I once studied Arabic for a few days haha.)

I couldn’t find any place to get a hold of rhassoul (or ghassoul as some spell it) here in my city, but I wandered into my friendly neighbourhood health food store, where I usually buy my henna, and lo and behold! was I ever in luck! They just happened to carry a huge, transparent plastic sack full of bentonite clay.

Needless to say, I immediately made off with it.

Bentonite Clay Hair

(Okay it just turns out to be the same colour as the wall behind it but not much I can do about that, our walls are all this same colour!)

Since I’d just hennaed my hair a few days ago, and henna can be drying (although I didn’t find that to be the case with me), I decided to oil my hair. But since I was going no ‘poo, I needed something strong enough, but that would still be natural, to get out all the oil.

Would bentonite clay do the trick?

Well, I tried it. After all, mud (because, when you come right down to it, that is just what clay is: mud) is famous for getting off all the oil from a place. It just sucks it right up.

Bentonite clay also sucks up all the toxins, lousy chemicals, toxic heavy metals, dirt and filth in your hair, so it serves not only for shampooing your hair but also for deep cleansing it.

That is why sometimes people on a detox regime will take bentonite clay internally (that is, they swallow it). I haven’t tried that yet, but it probably wouldn’t be a bad idea. After all, I’m sure one of the main factors contributing to the development of cancer is all the toxins we are surrounded by and eat.

So, I stuck several spoonfuls of clay into a plastic bowl (use more or less depending on how much hair you have) and mixed it purely with apple cider vinegar.

Don’t use a metal bowl or metal utensils, since I’ve just mentioned that this clay sucks up anything metallic, such as heavy metals, and you don’t want it getting activated by your bowl. You want it to get activated by the metals in your hair.

I made a paste a bit thicker than yoghurt, because I don’t like it to drip. I let it sit a few minutes and took it with me into the shower.

I wet my hair. Then covered it with the muddy bentonite clay mixture from root to tips and let it sit five minutes. Be sure not to let it dry out, so it will be easier to wash out afterwards.

It was the same as what I do when I henna my hair, but much faster and easier, because I didn’t have to worry about drips or staining my skin/the bathtub/the shower curtains etc.

After that, I just rinsed it out thoroughly with warm water. And that was it!

I didn’t even need to condition or detangle, since my hair came out naturally untangled. Just a bit of finger-combing was all that I needed.

Now, I do have to add, my hair is usually the ultimate self-tangling, birds-nest Medusa locks that twist around by themselves like snakes and tangle themselves up all by themselves. But with the bentonite clay, as with the shikakai, it didn’t tangle at all!

So, did it work to get the oil out? Well, see for yourselves:

Hair Bentonite Clay Henna

I am definitely incorporating bentonite clay and rhassoul (when I can get a hold of some) into my regular hair-care routine.

And while we’re at it, not to sound like a sleazy saleslady but I’ve written a few thrillers so, if you’re into creepy, scary, suspenseful novels, I’d love it if you’d check them out, here: Thrillers by Moi.

Well, what about you? Have you tried clay, rhassoul, baking soda or any other no ‘poo methods? Do tell tell! As you know, I LURRVE to receive (positive, non-spammy) comments!

Hair Bentonite Clay Henna

If you enjoyed this post (I really hope you do!), maybe you will also like:

Shikakai: My Recent Experiment

Going No ‘Poo

All Natural Skincare

Thrillers by Moi