Tag Archive | henna

My Henna Mix

Continuing on the subject of hair care as I’ve been doing for the past few months, I thought I’d share the current henna mix that I’m using these days.

Of course, when you mix up your henna you can always just use the pure powdered henna leaf all by itself and that’s just groovy.

But I like to enrich my mixture with other Ayurvedic herbs as well. I think it really helps to strengthen the hair more, make it thicker as well as conditioning the scalp and stimulating hair growth.

But I wouldn’t know if that’s really true. However you can read up about how I’ve grown my hair back after postpartum hair loss…….. that never recovered.

I do experiment a lot. So three months from now I might not be stirring up the same mix anymore.

But today, these are the ingredients of my henna mix:

My henna mix Ayurvedic herbs

I have long, thick hair. So I need a total of about 300g of powder.

  • 200g pure henna
  • 50g cassia obovata

I use cassia because since my hair is black you can’t see the henna in it at all. Nope, none at all. Cassia helps to lighten the colour a bit, I don’t know how or why it works but it does.

I also use cassia so the henna doesn’t loosen my curls, because I love my curls!

  • 50g manjistha

Manjistha is an herb that dyes red. It turns my hair a brilliant ruby red. I love it!

Red hennaed hair
  • spoonful of brahmi
  • spoonful of bhringraj
  • spoonful of powdered hibiscus
  • dash of apple cider vinegar
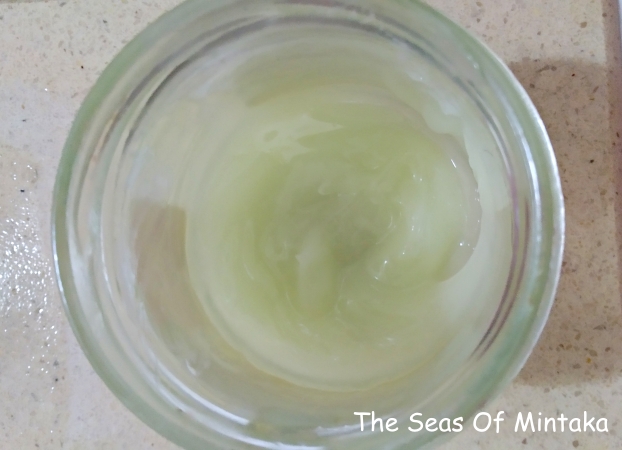
  • a good squirt of aloe vera gel
  • hibiscus infusion
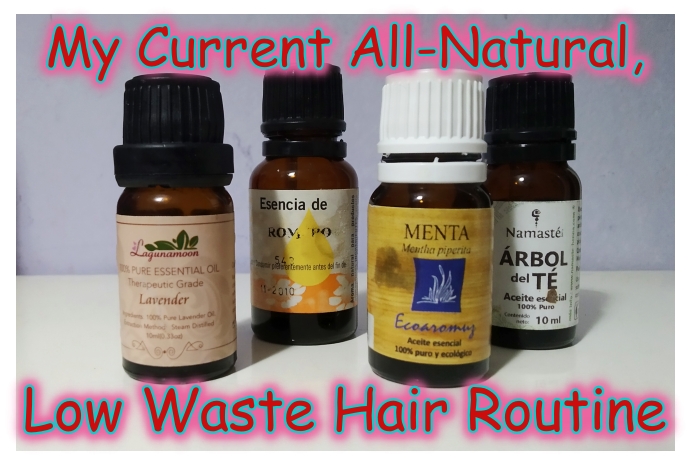
  • few drops essential oils

I mix all the powders together in a non-metallic pot except manjistha. I squirt in the vinegar and aloe vera gel.

In a saucepan I infuse hibiscus petals by boiling them in hot water. I can find these at any herb shop.

When the water is hot (but not boiling) I pour it into the henna and, using a plastic spoon (but any non-metallic spoon will do like bamboo, wood, porcelain etc.), I mix it up until it’s a smooth, dense paste.

Then I let it sit for dye release.

Different types of henna require different dye release times.

My trick for obtaining intense ruby red hair is to dye release for about 8 hours, then store the henna in the fridge until I’m ready to use it.

This seems to bring out intense tones.

Dye releasing for shorter periods of time seems to bring out a lighter, more coppery shade. Which is also cool, sometimes one does feel like a change after all.

An hour before I want to apply the henna, I pour manjistha into a small bowl. I like to add a pinch of baking soda, they say it makes for a bluer red. I don’t know if it’s true but it never seemed to hurt.

Then I add more of the hibiscus infusion I used in the henna. Manjistha only needs to sit for about half an hour to release its gorgeous, scintillating colour.

When I’m ready to apply the henna I mix in the manjistha and stir it all up together. Add a few drops of whichever essential oils I feel like.

I don’t use essential oils for the fragrance. Personally I enjoy the smell of henna. I’ve learnt to associate it with anticipating beautiful hair haha.

I use essential oils to help the henna stick to the greys which I unfortunately sport now. Fortunately, though, I don’t sport too many hehe.

And now henna is ready to apply.

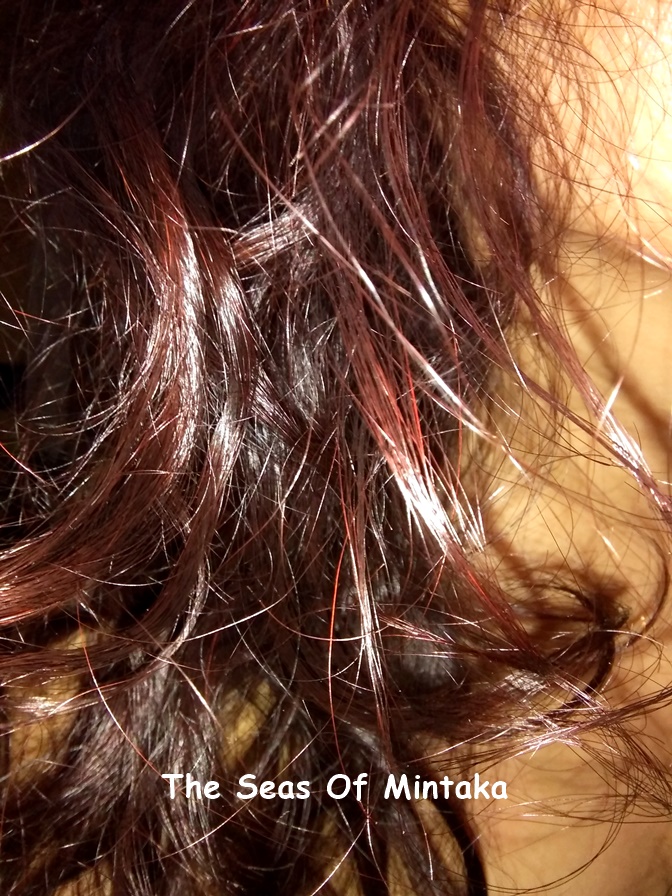
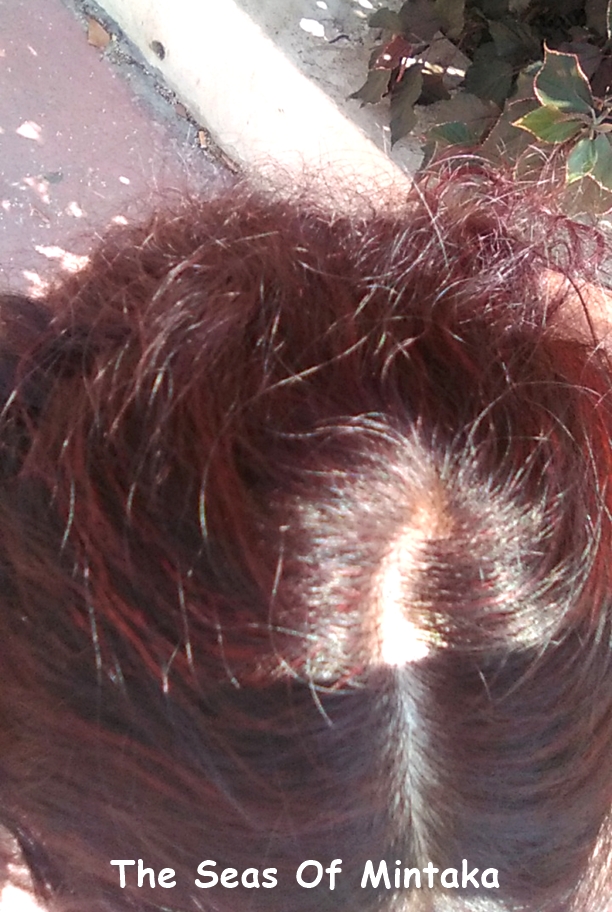
And here is the result:

Hennaed red hair

Oh and by the way I purchase henna and Ayurvedic herbs from one of the many online shops that have sprung up since covid began. It has become a lot easier thanks to online shopping now to find these products than, say, 5 years ago.

You can just do a google search for these herbs. Or if you are in the US I have heard that Henna Sooq is a really neat online store where they sell everything mentioned in this post. I’ve never purchased from them before, after all I am not in the US. But if you are, I’ve heard that they are good.

So do you have your own favourite henna mix? Don’t hesitate to share it with me in the comments down below.

And while you’re sitting around waiting for the dye to act in your hair, why don’t you read one of my thriller novels? You can find out more about them here: Thrillers by Moi.

Hibiscus flowers

If you enjoyed this post (I really hope you do!), maybe you will also like:

Natural Skin and Hair Care Routine

Bentonite Clay for Hair

Andalucía cuatro de la tarde

Currywurst

Advertisement

How to Grow Your Hair Back

Look at what a wonderful hair part I’ve got now.

Dense hair part how I grew my hair back

I look at it and I’m so surprised myself.

For years and years and years I had such a sparse part. It was sooo wide and bare and bald and there was just a little bit of hair and the hair was soooo thin.

I think I’ve grown the part hair back so nice and thick and dense in just the short time since covid began, because that’s when it occurred to me to get proactive and actually actively do things to try and get my hair back, after sitting around watching hair vids all day long since I didn’t have to go out to work anymore.

So this is what I think helped me the most to grow my hair back:

I think what was most effective was taking hair vitamins.

If you want more hair and you only have time to do one thing, I would definitely recommend you take HAIR VITAMINS.

I shuffle my hair vits around all the time. I started with Phytophanère and it was good.

Phytophanère

Then I changed to biotin and niacin and it was even better.

Then I started taking a vitamin B complex that has all the B vitamins and that is even better.

I remember as a child I had suuuuch thick hair, and I took multivitamins every day.

I guess no matter how well they eat the average person just doesn’t get enough vitamins in their diet.

I’ve developed a habit of regular hair oiling.

Before, I did oil my hair occasionally. I knew it was good for hair but I could never find the time to do it. Sometimes I went months without hair oiling.

Now I do it every week.

I have a whole article on hair oiling. Basically I have my own homemade scalp oil. It’s made from macerating a spoonful of brahmi, a spoonful of bhringraj, a spoonful of alkanet root oil and a pinch of dried rosemary in olive oil. I combine that with castor oil and some essential oils and massage my scalp with that every week.

For the lengths I like to use just olive oil and coconut oil. Nothing fancy. I don’t go out of my way to dig up exotic oils I can’t get from my local supermarket.

I try to do this every week. Since I’ve started doing henna glosses I now oil my hair every 2 weeks. And the week I don’t oil my hair I either use a henna gloss or I henna my hair.

And finally I’m crazy about henna and I henna my hair a lot.

I see most people who henna their hair regularly usually have lots of hair. Even older people who would normally have thinning hair, frequent at their age, if they henna regularly they always have lots of hair.

Personally, I was always hennaing my hair regularly and still I suffered from the bald, thinning part. So I don’t think it’s the henna by itself that made the hair thicker.

But I’m sure henna helps. And combined with everything else I’ve been doing, well, it works.

Other than this I’m really not hiding any other secrets on how to grow your hair back. I’m still using the same solid shampoos I’ve been using for years.

And I almost always use a hair mask instead of conditioner after shampooing.

I do use leave-in’s and curling products, but that’s probably not necessary if you don’t have curly hair.

I started applying Ron Quina (more about this miracle product in a future post…… maybe) but I only started recently, maybe a month ago when I discovered it from a video. And I rarely ever remember to apply it so I don’t think it’s been able to do too much so far to help my hair grow.

Ron Quina

I did also start carrying out regular scalp massages, almost every night. I’m sure that helped. I don’t use any oil or products, just a massage. When I remember to apply Ron Quina I do the massage with Ron Quina. But I don’t apply Ron Quina very often.

My son Ermenegildo also uses Ron Quina, he hopes it will prevent male baldness.

Ron Quina has been around for about a century and many men swear by it, they say they never suffered from male baldness thanks to Ron Quina. So I think it is worth a try, if you are constant and consistent to use it.

So do you have any hair growth tips you’d like to share? Don’t hesitate to leave me some comments, I lurrrve (positive, non-spammy) comments.

And if you’d like to read about something more exciting than plain old hair, I’d love it if you’d check out my thrillers. You can do so at this website: Thrillers by Moi.

Henna 4ever T-shirt

If you enjoyed this post (I really hope you do!), maybe you will also like:

Daily Supplements

My Thoughts on the Zero Waste Sustainable Lifestyle

The Meaning of a Friendship 

Photographs From a Typical Day In a Life

Some Ayurvedic Plants that I Use for Hair

So, if you’ve been reading the past few entries, I guess you’ve probably picked up on that I’m crazy about using Ayurvedic and plant-based stuff for my natural hair care routine.

Henna 4ever T-shirt

Here are some of the plants that I use and their main properties:

Amla: Emblica officinalis or Indian gooseberry, is a round green fruit with antioxidant properties. Ayurvedic practitioners swear by this plant and not only use it on the hair and skin but also eat it. I don’t eat it because it isn’t sold here as a fruit where I live. It softens hair and helps to fix the dyes of henna and manjistha to the hair. I personally don’t like to use this plant too much because it darkens my already almost jet black hair, and I don’t want that!

Brahmi: or Bacopa monnieri, is considered THE herb par excellence for hair care. Like amla, brahmi is also antioxidant. It thickens the hair thus making it stronger and less prone to breakage. It also strengthens the follicles, which prevents hair fall. I use this quite a bit and always put some in my henna mixes.

Bhringraj: Eclipta alba is supposed to be a real tonic to help your hair grow and you are supposed to be able to use it if you are having hair fall or getting bald spots. I also add this to henna. And I also make a hair oil using this. I simply put one spoonful of Bhringraj into a large glass jar, along with a spoonful of Brahmi, a pinch of dried rosemary and another spoonful of Alkanet Root, then top the jar up with olive oil. I take a little bit of this oil to use every time I oil my hair.

I like to nickname Bhringraj, Brahmi and Amla as the sacred Ayurvedic triumvirate haha. Just the 3 of them alone are so potent, you can do almost anything even if these are all you have. So Popeye’s spinach, move aside!

Shikakai: Acacia concinna contains saponins, which are like a natural soap and actually do foam up. I originally wasn’t too sure about using this in a hair mask and I also didn’t really believe it could really wash well. But after adding Shikakai to the hair mask, when I was rinsing it out without using any other products like shampoo, I noticed that the water was coming out foamy and sudsy. So it apparently helps to clean and purify the hair and scalp and lathers up really well too.

Hibiscus: I add powdered hibiscus to my henna, but I make the hot infusion that I mix henna with using dried hibiscus flowers. Hibiscus grows in wonderful tropical places like southern Spain, where I live. It also grows in Hawaii and people there use it to make garlands. Hibiscus imparts red hues to hair and also softens it.

Reetha or Aritha: also called soap nuts. You can buy them whole, as soap nuts. Or you can buy them powdered. If they are powdered you can add them to your hair masks. But they wash things really really well. I do my laundry with them — with the whole soap nuts, I mean, not with the powdered ones. You can use Aritha alone or combined with other plants to wash your hair.

Manjistha: Rubia cordifolia is one of my favourite plants because it imparts my all-time favourite ruby red shade to my henna mixes. It really does turn my hair ruby red.

Red hennaed hair

You have to dye release it separate from henna because it doesn’t work with acids the way henna does. I was releasing the dye using baking soda, which is alkaline, but I might stop doing that because they say alkaline substances dry hair out. But it’s been working fine for me.

Alkanet Root: Alkanna tinctoria is a little-known secret plant that is supposed to turn your grey hairs back into coloured hairs. I’ve been using it for a while, now I can hardly ever find any grey hairs on my head anymore. But since I also henna frequently, I don’t know whether this is because I don’t have any grey hairs anymore, or because I henna so often there isn’t time for the grey hairs to grow long before I cover them with henna again, so you just never see them hehe. It also grows in the Mediterranean, so you’re not shipping it over from the other side of the world. I put a spoonful of Alkanet Root in a large glass jar along with a spoonful of Bhringraj, a spoonful of Brahmi and a pinch of dried rosemary, then top the jar up with olive oil. The Alkanet Root turns the oil a gorgeous shade of deep red. But if you try to dye your hair red with it, it won’t work unfortunately. I take a little bit of this oil to use every time I oil my hair.

Sidr: I tried washing my hair with Sidr or Ziziphus Jujuba once, you can read about it here. Like Aritha and Shikakai, you can use Sidr to wash your hair. I found out you can also use it like Cassia, to combine with henna to make it a bit lighter. But for that purpose I personally prefer Cassia, because it’s easier to get a hold of, it’s a lot cheaper and it doesn’t suds up. After all I don’t really fancy sudsy henna.

Cassia: I like Cassia obovata, which scientists now prefer to call Senna italica just so that they can get us all mixed up and boast about how they know Latin and we don’t harhar. (Believe me they do like to boast about it, my parents were scientists and in their day science students were forced to learn Latin at university. So after all that hard work trying to master a language that no one speaks today, how would you not boast about it?) Cassia is great to combine with henna to make the shade lighter, which I do all the time because when you have jet black hair you always want to pull towards lighter, and lighter, and lighter. But if you don’t want red hair and you want the conditioning properties of henna, you can use cassia instead. It will give your hair all the shine, strength and thickness that henna does but without the colour. If you dye release it, it might stain your hair a little bit yellow, if you want to go blonde. But I don’t mean like canary yellow hehe, more like a golden blonde shade.

Henna: Lawsonia inermis. If I had a personalized T-shirt it would boast a pic of a henna leaf and the logo “Henna till the end of my days” haha. Because that is how much I love my henna. My house is filled with boxes of henna. I thought I was a weirdo but then I saw a video of a woman who was about to henna her hair and her cupboards were filled with bags of henna too! When you get into the henna culture you just can’t get enough of it. I apply henna once a month and halfway through the month I apply a henna gloss too. So you can imagine I use up a lot of henna.

I thought I’d mention 2 more plants as well, rosemary and nettle. Because I wanted to know if there were any locally available plants that could help with hair growth, as it’s more sustainable to purchase local plants rather than get them shipped over from the other side of the world. Well I could never find any local alternative to henna, but rosemary and nettle are pretty mean locally-grown alternatives that could probably put up a good fight with Bhringraj to help get your hair to grow.

I bought dried nettle as well. Well you certainly don’t want it fresh, it stings! I haven’t tried it yet though. But you can use it the same way as rosemary, that is, infused in oil to use as a hair oil or in hot water to add to your hair masks.

So these are the plants that I use on my hair. I might add that I don’t spend the whole day every day brewing up plants for my hair care, even though from these posts it might seem that way. Most of the time I use store-bought hair products filled with artificial chemicals because I’m lazy and busy.

But I try to put plants on my hair once a week or if I’m busy, once every 2 weeks or at the very least, once a month.

Red hibiscus flowers

So how about you? Do you use plants on your hair or in your skin care? Don’t hesitate to leave me some comments below, I lurrrve (positive, non-spammy) comments.

And while you’re at it I’d also love it if you’d check out some of my thrillers. You can find out more about them here: Thrillers by Moi.

If you enjoyed this post (I really hope you do!), maybe you will also like:

Daily Supplements

DIY Catio for Cats

On Christmas Day in the Morning

Castile Soap and Coconut Milk for Hair

My Current, Almost All-Natural, Low-Waste Hair Routine

Essential Oils for Hair

I thought I’d start off the new year with a new series on All-Natural Hair Care. So here is the first instalment.

I have been no-poo (that is, no shampoo) for about 3 years now. You can read about how I transitioned to no-poo here.

Recently I’ve also decided to add zero-waste to my hair and general routine as well. That is not the easiest thing in the world to do when you have dry, frizzy, curly hair.

Ayurvedic Herbal Powders

However, after about a full TWO YEARS! of experimenting and watching a gazillion YouTube videos, I think I’ve FINALLY found a minimalist, natural and low-waste (not zero-waste, however) hair routine that works for me.

It’s not the simplest, most minimalistic, most low-maintenance routine that’s ever existed but then again I figure girls with curly hair can’t follow the same routine as people with straight hair. Curly hair is drier so it needs more care. And my hair in particular is especially tangly (I’ve always called it self-tangling hair because it tangles around everything), with a naturally coarse, rough, wiry texture.

So here is my………

Complete All-Natural Zero Waste Hair Routine:

Week 1:

  • I begin by brushing my hair with a wooden brush. I brush it right side up and then upside down to get out tangles and stimulate hair growth.
  • Then I rub in hair oil. On the scalp I use a concoction that I made myself. In a jar I mix castor oil + olive oil + a teaspoon of bhringraj and let it sit. When I’m going to oil my hair, I just pour out the required amount into a small bowl and add a couple drops of rosemary and tea tree essentials oils. When it’s getting low on oil I simply add more oil. After a few weeks I throw out the bhringraj (I have no idea how long it would be good for though or if it ever goes bad) and add a new teaspoonful of this herb.
  • On the lengths I use coconut oil or olive oil. Then tie in a bun.
  • I leave this on for 2-3 hours. You can also leave it on overnight and sleep on it if you prefer.
  • Wash with solid shampoo or all-natural handmade soap.
  • Condition with solid conditioner.
  • Style as usual.

Hair OIling

Oiled Hair

Notes:

*I’ve been experimenting with solid conditioner for a few weeks now and I’m a bit on the fence about it. On the one hand, I like that it’s zero-waste, all-natural and silicone-free. And it smells fantastic.

But on the other hand, it takes forever to rub it through my extra-tangly, self-tangling rough, coarse hair. It also doesn’t leave my hair feeling as soft and hydrated as a cream conditioner.

I’ll be putting up a separate post soon all about solid conditioner. So stay tuned for it!

Since my hair is so naturally rough and coarse, I have a hard time trying to make it soft. If your hair is fine and naturally soft, it might work better for you though.

For this reason, even though I love the concept, I find that every now and then I still need to fall back on a creamy, liquidy conditioner in a plastic bottle, or my hair gets very dry, frizzy, flyaway and extra tangly (and it’s already tangly enough as it is!).

Week 2:

  • Don’t oil hair. But do brush it.
  • Wash with a mixture of aritha + sidr or shikakai and methi (ground fenugreek), mix with lemon juice or flaxseed gel or warm water to form a dense paste similar to shampoo. Apply like shampoo, leave on a couple minutes and rinse out.
  • Mix amla and brahmi with warm water to form a thick paste similar to conditioner. Apply to length of hair, detangle, leave on for 5 minutes and rinse off.
  • Style as usual.

Notes:

*I have been using sidr instead of shikakai because I’m able to get it at the same online shop where I buy the rest of the powders. And because shikakai can sting your eyes.

I also wasn’t too wowed by shikakai when I used it before. But if you can’t find sidr in your neck of the woods, it’s fine to use shikakai as well.

Sidr is the powdered leaves of a tree that grows in Persia (Iran) and the Middle East. Like aritha, it has saponins, natural soap, so it cleans your hair gently.

To make flaxseed gel, simply boil a teaspoon of flax seeds in a cup of water for about 15 minutes. Then strain out the flax seeds with a strainer, cool the liquid down until it’s warm and doesn’t burn and use it to mix up the herbal shampoo.

Because I have curly hair using some sort of styling / curling / hold product is a must. If I want to be completely natural and zero-waste I use flax seed gel by itself. But I get bored always using the same product so I like to switch things up. Then I do need to add in some commercial product in a plastic container.

Where I Buy These Products

I buy these ayurvedic powdered herbs at an online shop here in Spain. If you’re lucky enough to enjoy the presence of an Indian community in your city, they’re sure to boast physical shops where you can acquire them as well.

I’m not that lucky as there are perhaps only 2 people of Indian origin living in my part of the world. But if you happen to live in Barcelona, where I used to live, you can scout the shops of the Raval. I used to buy these herbs there.

It’s not easy to find solid conditioner here in Spain, unless you live in a large city. I don’t. But I was soooooo lucky to find an ecological, green shop downtown. It’s called Verda.

However they are also available on Amazon.

Aloe Vera Scalp Massage

Every once in a while, when I get in the mood, I’ll massage my scalp with some aloe vera gel. I add rosemary, lavender, mint and tea tree essential oils in the gel. Then I rinse it out after a couple hours in the shower. It’s a gel and not an oil so it doesn’t leave hair greasy, so it’s not necessary to use shampoo.

Aloe Vera Gel for Hair

My son prefers to do this after he washes his hair. It really doesn’t make any difference in the appearance of your hair, it won’t make it look greasy, so you can do it either way.

Henna

I henna my hair about once every 2 months. Because…….. I have a few grey hairs already! Hush, it’s a secret. Don’t tell anyone.

Hennaed Hair à la The Ring

My hair doesn’t turn out too red because it’s naturally very dark. Although I imagine if I hennaed it more often it would get redder. But I’m too lazy for that haha. It also looks redder in the sun.

Hair With Henna

I love henna hehe.

Heatless Hair Straightener

Although I LOVE having curls, I can get bored with them always looking the same and I want to change them. Then I make braids and thus stretch the hair out a bit to create beach waves.

My hair is very healthy. It’s about to the middle of my back. And I never have split ends.

So I think this routine is working quite well for me. [:smile hehe:]

And now that we’ve reached the end of this post, if you feel like doing some more reading I’ve got plenty of offerings for you. Check out my collection of thriller novels and horror stories here at Thrillers By Moi.

If you enjoyed this post (I really hope you do!), maybe you will also like:

Homemade Soap 

Natural Skin and Hair Care Routine

Castile Soap and Coconut Milk for Hair 

Proper Hair Oiling For Long, Drop-Dead Gorgeous Locks 

Going No Poo

I’ve been on a natural health products craze lately, trying to reduce the amount of chemicals that we use in our life as much as possible. And no poo has been my latest craze.

As you may (or may not, haha) know, no poo means swearing off conventional, commercial, chemical-filled shampoos and using our own homemade ones, or ones made with all natural ingredients, instead.

I’d just hennaed my hair again after about three whole months without doing it. You can see some pics of the results here:

Henna Hair

I was so delighted with the effect of the henna, all of a sudden I was filled with the desire to never use chemicals on those glistening locks again. (The fact that I’d been researching places online to find the purest, highest-quality henna, and discovered some really scrumptious sites that sell luscious Indian herbs as well, didn’t really hurt the cause—even if it was perhaps not the best idea for my pocketbook haha.)

At any rate, if you are in Spain (or anywhere in Europe for that matter—but I am always looking for places with the best shipping rates to Spain in particular, of course), here are two sites that I can recommend. Both carry all types of henna—some of which are pure and some, well, not quite so much—as well as all manner of Indian herbs such as shikakai, amla, neem, aritha……

Bazar Al-Andalus: Carries the most delish and delightful variety of anything Indian or North African you could possibly desire, including natural, vegetarian, LEAD-FREE kohl (it is the works! One day I will write about my experiences with their kohl here on this blog). Not only are they located in Granada, which is only an hour away from my house, it literally took LESS THAN TWENTY-FOUR HOURS from the time I made my order for it to arrive at my doorstep! Is that ultra-fast shipping or what??

Aromazone: A company located in France, which is my number one choice (next to iHerb, but iHerb doesn’t carry all the scrumptious raw ingredients and raw material that Aromazone does) thanks to its incredibly low prices. To give an example, a package of shikakai from this company costs only a fraction of what it does at Bazar Al-Andalus. I haven’t ordered anything from them yet, but I am planning to.

But getting back to the subject at hand, which is: going no poo haha!

As I was saying, I started researching other hair washing methods instead.

My first experiment was with shikakai. You can read about my experiences here: Shikakai: My Recent Experiment.

My next foray into no poo was with bentonite clay, which you can read about here: Bentonite Clay for Hair.

Next up after that is my post on castile soap with coconut milk.

I don’t yet have a regular no poo routine, since I’m still experimenting. Although as I’ve said, I’ve been ‘poo free for about 3 weeks now and still going strong.

So, do I ever plan on going back to conventional, chemical-filled but oh-so-easy-to-find store-bought shampoos again? Well, as long as I’m able to source clay and natural handmade soap, I don’t believe I will.

I’ve also been going chem-free in other areas of life.

I began by changing to all natural soap flakes to wash our clothes instead of regular detergent.

I’d been using soap flakes for years, but then I got to reading consumer reports on laundry detergent, and that only served to pique my curiosity. Now all of a sudden I wanted to try out all those detergents!

However, I wasn’t satisfied with the results of any conventional detergent, not even the ones touted as being the most effective, and which everyone raved about. I found that, no matter which way you looked at it, clothes simply came out cleaner—and with far less product—using simple soap flakes.

So I went back to soap flakes, and I haven’t varied since.

The only thing I haven’t been able to find yet is a natural fabric softener that actually pleases me. Now, I must make clear that when it comes to clothes, I am THE ORIGINAL PRINCESS from The Princess and the Pea.

So needless to say, clothes that come out even the slightest bit cartony, cardboardy, scratchy or stiff just DON’T MAKE THE BILL with me.

I’ve tried apple cider vinegar, regular vinegar, baking soda and any combination of the three to soften clothes. But I’m sorry, it was a no-go for me and I’m still using chemical-filled conventional fabric softeners.

If you’d like more info about going no poo, here’s a website that covers most questions on the subject: The No Poo Method.

And while we’re at it, not to sound like a sleazy saleslady but I’ve written a few thrillers so, if you’re into creepy, scary, suspenseful novels, I’d love it if you’d check them out, here: Thrillers by Moi.

So how about you? Have you tried the no poo method? What have your results been? What methods do you use? Do tell tell! As you know, I LURRVE to receive (positive, non-spammy) comments!

Henna Hair

If you enjoyed this post (I really hope you do!), maybe you will also like:

Henna

All Natural Skincare

Proper Hair Oiling For Long, Drop-Dead Gorgeous Locks

Thrillers by Moi

Henna

With all the different subjects out there that I could muse about, in the end I decided to continue on a bit more with the theme of natural health-natural cosmetics-natural beauty. So today let’s talk about hair!

I’d always wished I’d been blessed with gorgeous, shiny locks of brilliant spun gold, not only is golden hair beautiful, it also rejuvenates and endows the features with light, youth and grace. But I wasn’t so lucky, in fact Mother Nature decided that not only would I not enjoy a crowning glory of royal gold waves, she actually went ahead and weighed me down underneath sheets of heavy black.

Well you could go on and praise the magnificence of raven black locks. It was the colour that Anne of Green Gables daydreamed of so insistently that she actually went out and dyed her own carrot-red waves, against her strict adoptive mother’s will, with the unreliable concoctions that existed 100 years ago, when the story was written. With the unfortunate result that her hair turned a glorious dishwater, slimy green.

I’ve got the opposite problem of Anne, however, but unlike her I am able to fulfil my dreams of flaunting a head full of fiery red. Well maybe not that fiery, but in my books it’s certainly an improvement over jet.

Last post I recounted my secret for beautiful skin. Now I’m going to talk about my tips for lovely hair. Well, for lovely black, brown or brunette hair at least. In a future post (if I ever get around to it) I will, nonetheless, hopefully, explain how you can enhance your drop-dead to-die-for golden locks without laying your hands on a single chemical, as I did for my baby:

But today black or dark hair is the order of the day. So let’s go, talking about henna!

Henna is a plant, a small tree, whose unassuming leaves produce a belligerent red dye when crushed and mixed with liquid, preferably a slightly acidic one. I suppose everyone has heard about body art and temporary tattoos made with henna. However today’s post only deals with henna for hair.

Henna has traditionally been used for millennia to enhance women’s hair in lands where the plant grows and where, coincidentally, women also generally sport black or dark hair naturally.

I imagine that all this theory, however, probably doesn’t contribute tremendously to what women (and maybe the occasional man too!) really want to know, and that is, how do we use henna?

Well the internet is chock full of websites about henna and how you can prepare it. I’ll just explain what I personally do. It’s easy and quite effective, for me at least.

About a day before I want to put henna into my hair I prepare a henna concoction. I use 300 g. of henna and I have long hair. If you have shoulder-length hair I would recommend about 100 g. and 200 if you have mid-length (a bit below the shoulders) hair.

I mix the powdered henna (I just buy it from a local natural food shop, very lucky to have found it heehee!) with a large mug of lemon juice. Okay I’m lazy I buy lemon juice in a bottle from the store and it works just great. But of course real natural freshly-squeezed lemons is better!

After that I cook up a strong infusion of chamomile, chamomile seems to lighten black hair slightly and make the henna show up more, in addition to bestowing a splendid glow and shine to hair. Once the infusion is cooled (don’t put boiling infusion into the henna because it will cook the plant and cooked leaves won’t yield any dye) I mix as much liquid into the henna concoction as needed to form a thick paste, with the consistency of very thick yogurt.

Imagine that you will be putting this onto your head, so you don’t want something that drips. But if it is too solid it won’t spread well. Finding the perfect balance is simply a matter of practice. Since you get the best results if you apply henna once every month, you can acquire plenty of practice!

Once your concoction is all mixed up, let it sit for about 12 hours in a warm place. This stimulates the henna leaves to release their dye, dye which will later go onto your head and into your hair.

And now, when you’re all ready, let’s get into the shower. Keep in mind that you should set aside about 4-6 hours of uninterrupted time for this process, so a good moment to do it is when you don’t have to go to work. If you’re so lucky as to have light coloured hair, like mousey brown or blonde, you can take less time. If, however, like me, you have the deepest most impenetrable locks, then you must think that it will take a long time for that coveted auburn stain to take hold.

Step into the shower or bathtub with your large pot of mud, which is what henna looks like. Now you can have the time of your life smearing muddy henna all over your head in any order. Or you can smear it on in an orderly fashion, one lock at a time starting with the crown and working your way down to the ends, like professional hairdressers do. Any way you do it, the end result is a mass of tangled mud, which you pile onto the top of your head. Wrap saran wrap around it and you’re ready to face your day!

For me facing the day usually means tiresome tasks like cooking and washing. Yep, when you have a family you don’t get breaks so you can relax with your henna. As you’re scrubbing the pots you can daydream about all those lovely Middle Eastern misses who could permit themselves the luxury of lounging indulgently in public hammam with their hair up in a hennaed bun while professional masseurs gave them the full spa treatment.

If you’re lucky, however, maybe you can get in a chapter of CSI or Castle during breaks from the kitchen.

I leave henna on for at least 4 hours, but if you’re one of those fortunate ladies with pale hair you can get away perfectly with maybe just 2. When you’ve left it on long enough, it’s time to wash it out.

Easier said than done. Henna leaves your hair like a bird’s nest. Like the nest of a bird that just had a knock-down-drag-out battle with an eagle.

I find that the easiest way to disentangle bird’s-nest recently hennaed hair is by slathering conditioner on generously. Don’t leave a strand uncovered with the conditioner. Once you’ve straightened your hair out a bit with this conditioner you can then shampoo and condition as usual.

Lastly, dry and style as always and enjoy your cascade of ravishing, flaming waves.

One last note for healthy hair naturally. I always like to give hair a deep oil treatment once a week. Just rub oil all over your hair from root to ends and leave it on for an hour or 2. You can put it up in braids or a bun if you prefer, so it won’t rub off on everything. I like coconut oil (as you can easily discover by reading on to the next post) or olive oil. After normal shampooing and conditioning, both will leave your hair strong, super soft and shiny, healthy and moisturized. Now you can throw all your expensive salon formulas out the window and never look back again.

Coconut oil

Most unprofessional photo if I do say so myself, but that's what my humble little jar of coconut oil looks like.

Okay so this isn't coconut oil it's coconut milk, but my coconut oil is in an unmarked jar, and this pic has a photo of a coconut which sure looks yummy!